On our guided tours with classes for this exhibition we’ve been getting questions from students around the print making process. Our Education Coordinator EJ designed a great activity inspired by the Young Contemporaries 2022 exhibition. The best way to learn about an art-making process is to dive in and get your hands dirty. It’s Spring Break this week for Charleston County School District, so perhaps you can try this with the young learners in your circle? As with any art making, there is no age limit on participation, so let’s get started!
DryPoint Collagraph Activity: An Introduction to Intaglio Printmaking
Estimated time: 1 hour
Materials:
– Cardboard box, flattened, not corrugated — ie. use an old cereal box!
– Sealant — glue, acrylic gloss medium, spray fixative, etc.
– Scissors, Xacto knife — something to indent or cut away
– A cutting board or plastic mat to protect the table
– Wooden or metal spoon
– Acrylic paint, container to use as a paint palette (plastic cup, disposable plate)
– Marker, Sharpie
– Newspaper
– Gloves
A collagraph is the combination of collage and printmaking! Collographs can be used to print images in relief or in intaglio, depending on what collage materials and techniques you use. In traditional relief printing, like woodcuts and linocuts, whatever spaces are cut out become the white space, or negative space of the image –– like a rubber stamp! Here are a few examples of relief prints in the Young Contemporaries exhibition.
Collagraphs can be used to be printed in intaglio, like copper and zinc plate etching, where lines are etched into the surface of the plate and these lines hold ink. Similar to how a river holds water! Any lines or shapes that are etched into the plate will deposit ink as a line on the paper. These lines can be made in a few different ways. Etching needles can be used directly on a metal plate to scratch out parts of the surface –– this technique is called drypoint and is what we are going to use on our collagraph plates in this activity. In professional print studios, these lines can be etched into the place using an acid bath, a process called “biting,” and are printed at high pressure using a press. Handprinting, like in this activity, is a printmaking technique where a person uses their own strength and a smooth tool like a wooden spoon to transfer the image from the plate to the paper.
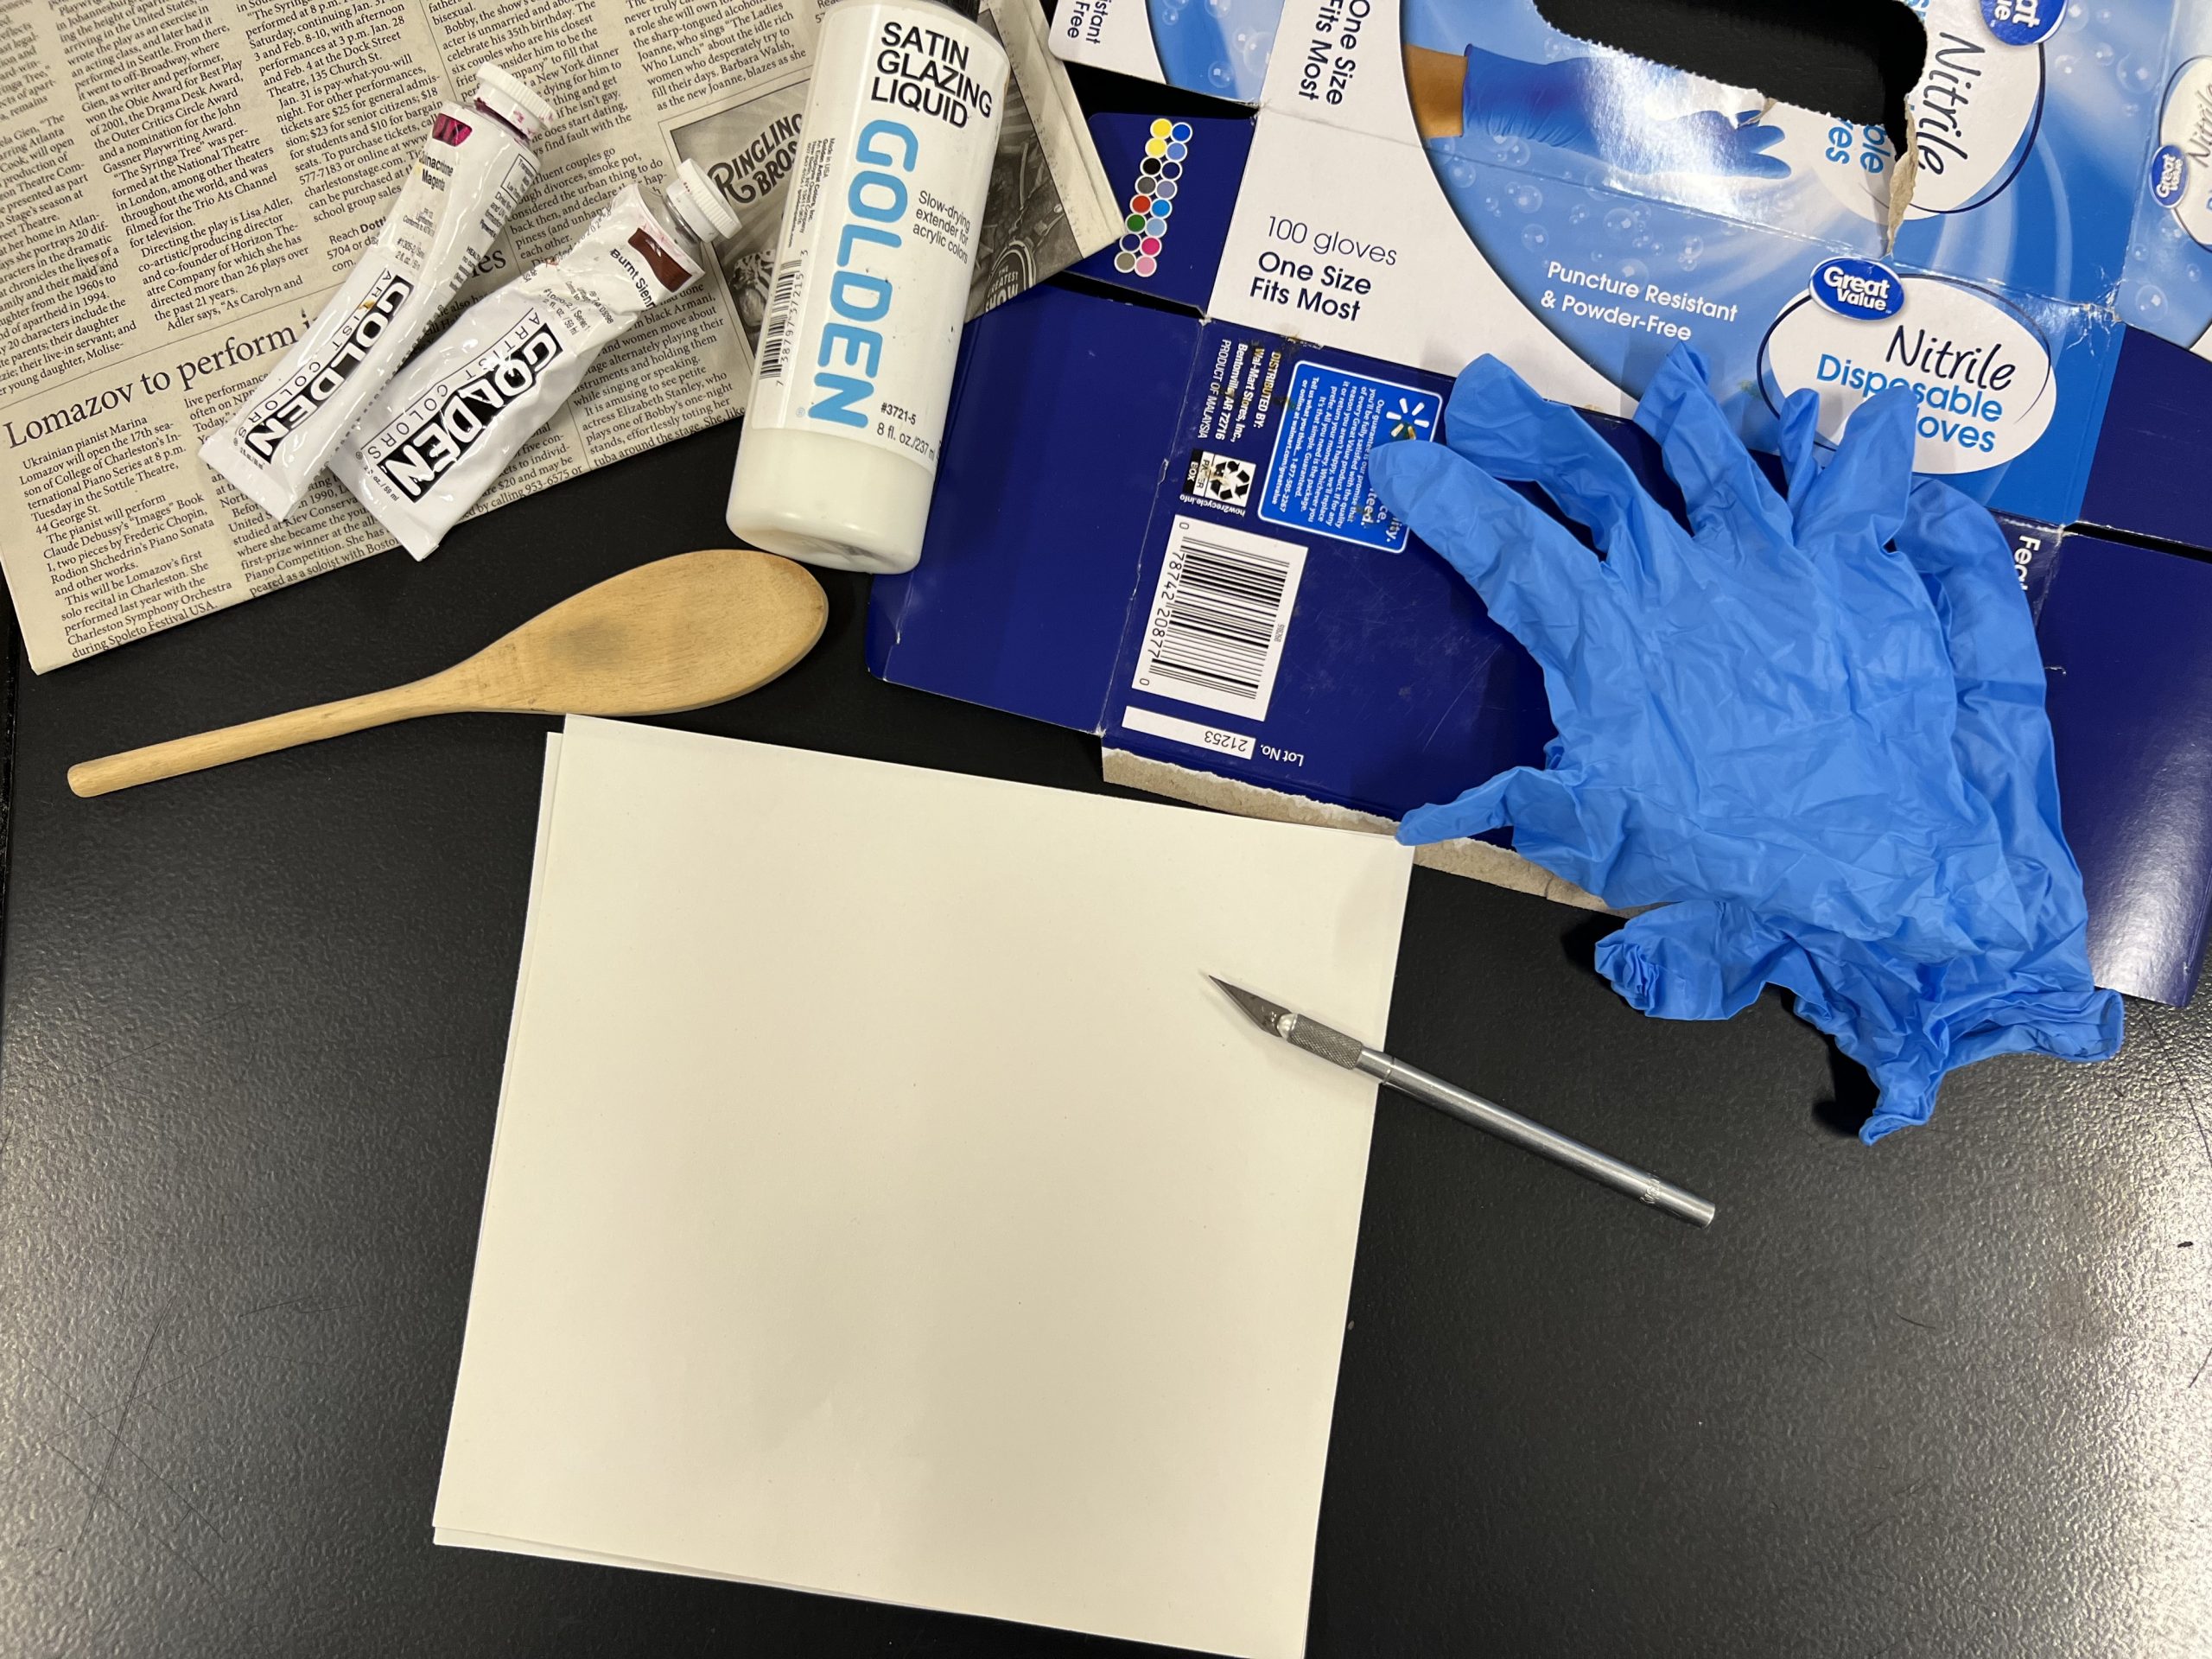
To start, collect your materials!
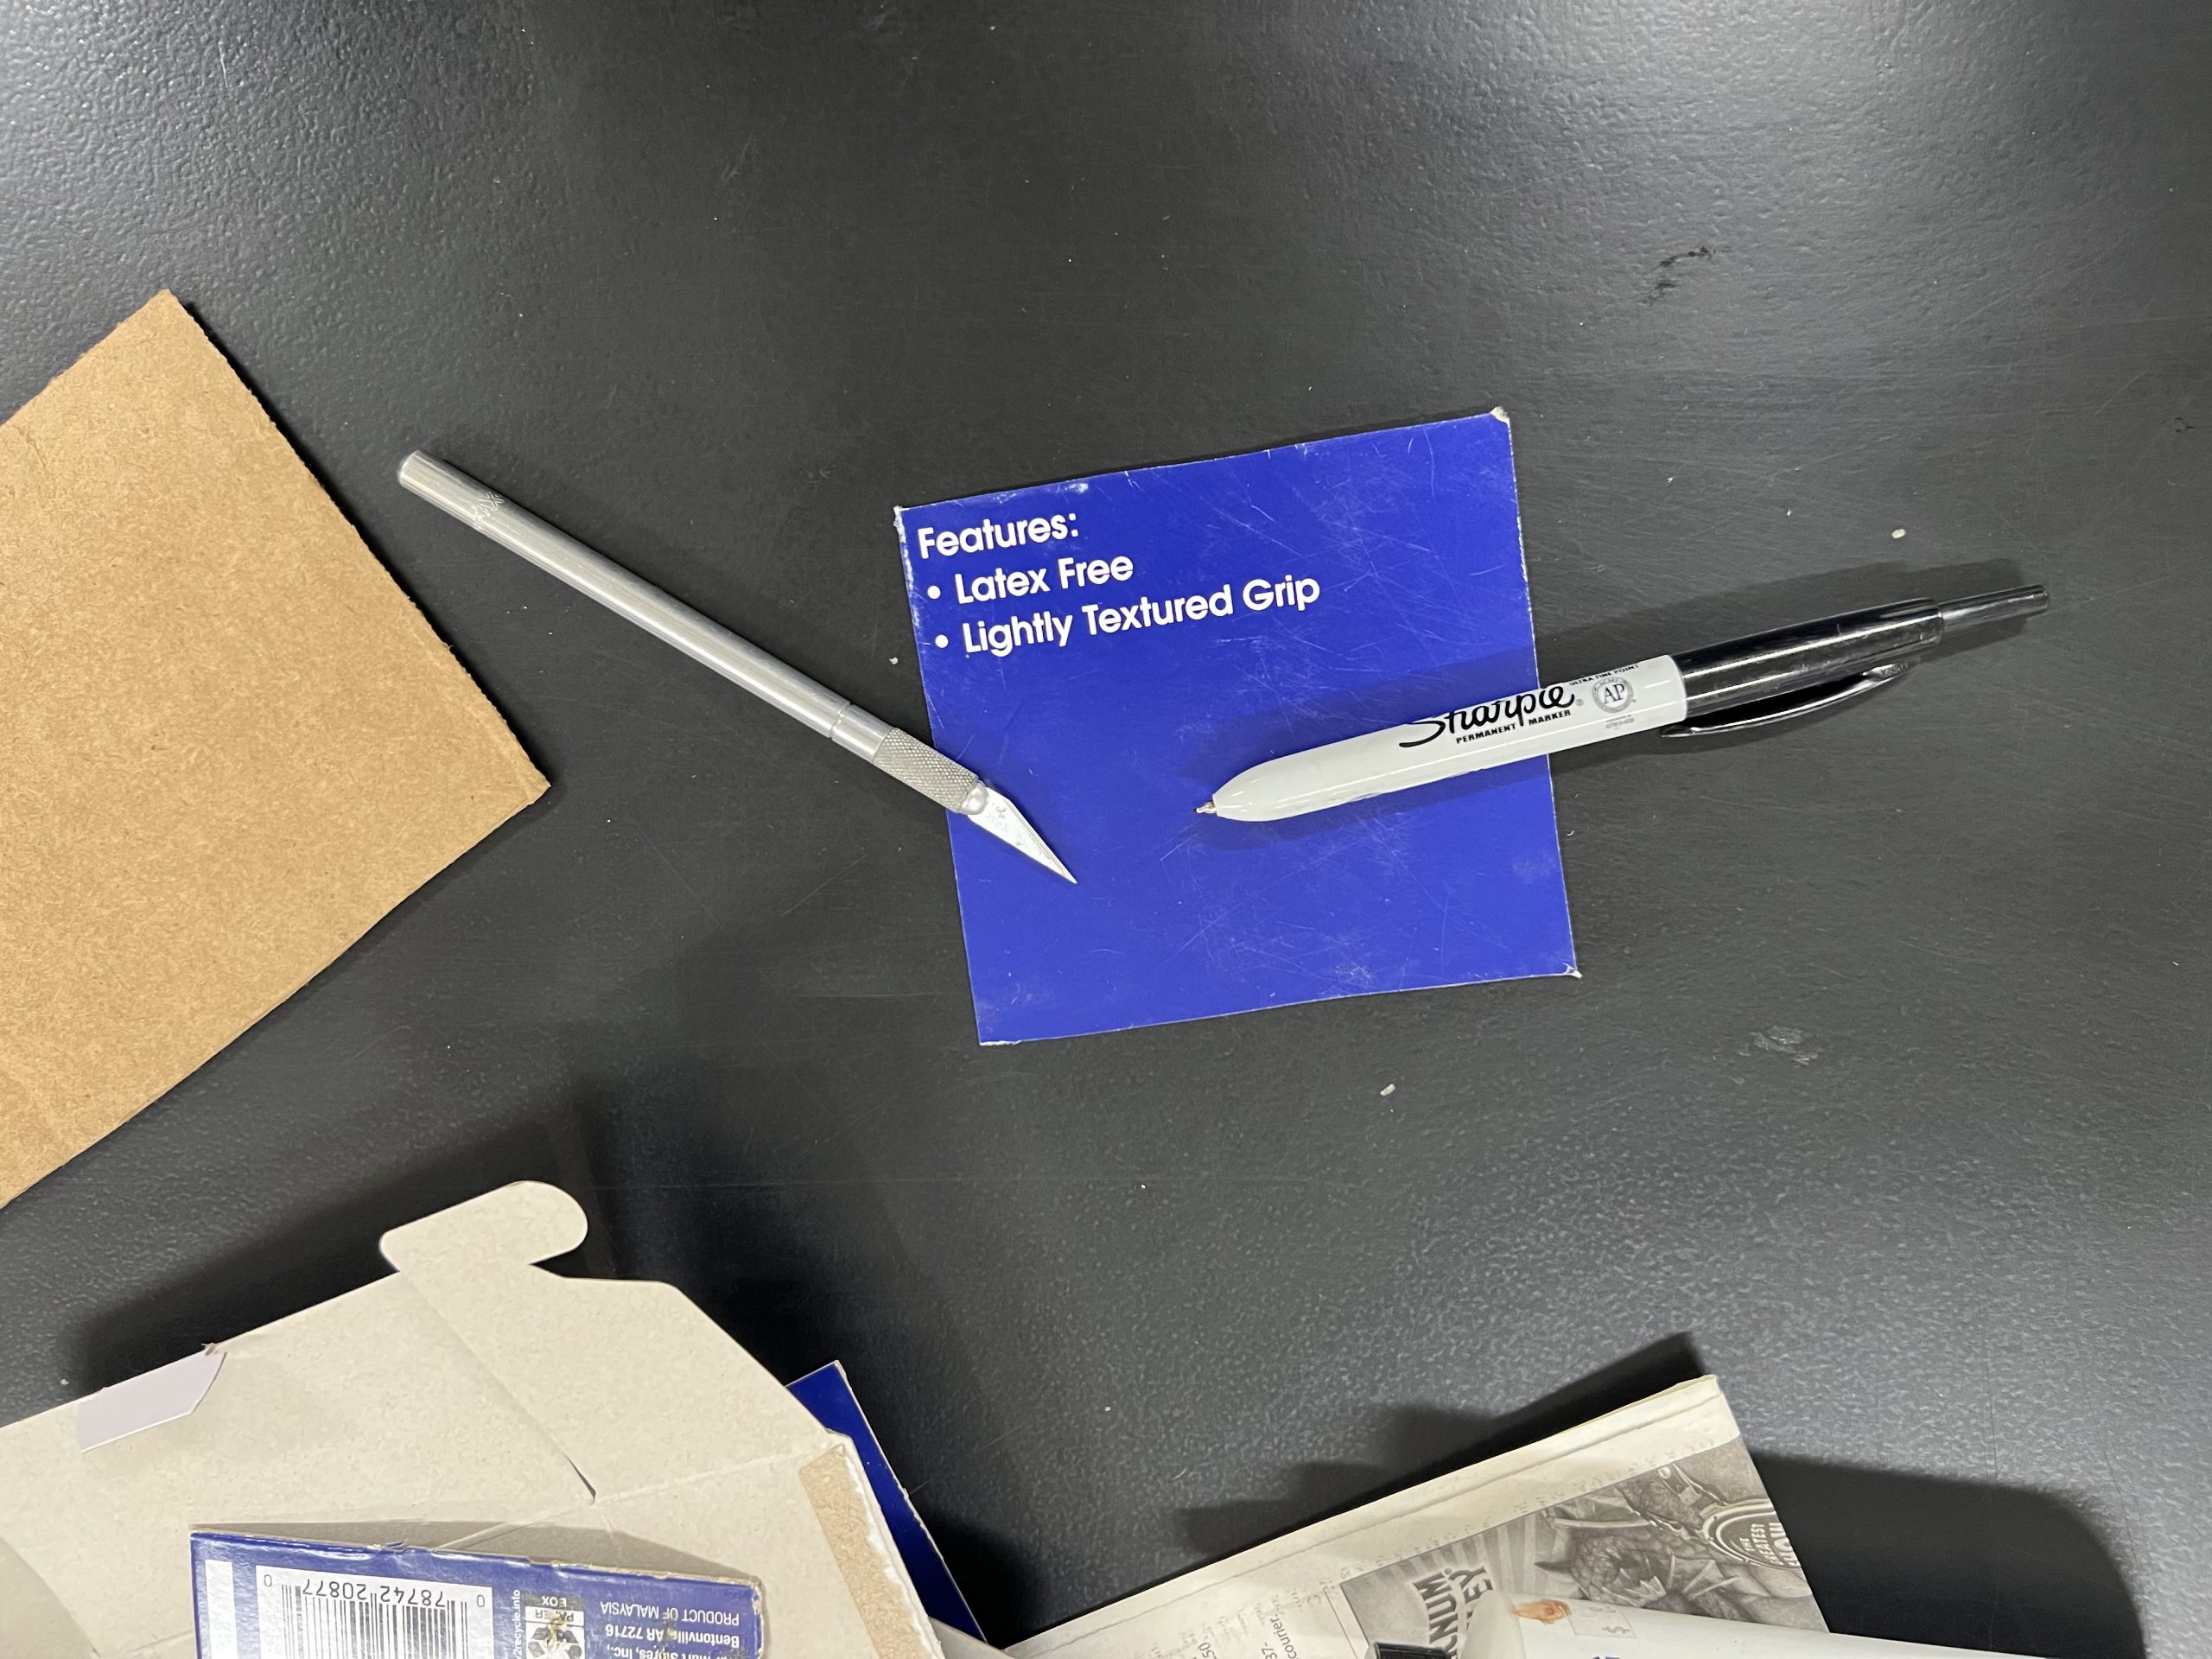
Use an Xacto knife or scissors to cut out a section of the box to put your design on. This is your printmaking “plate.”
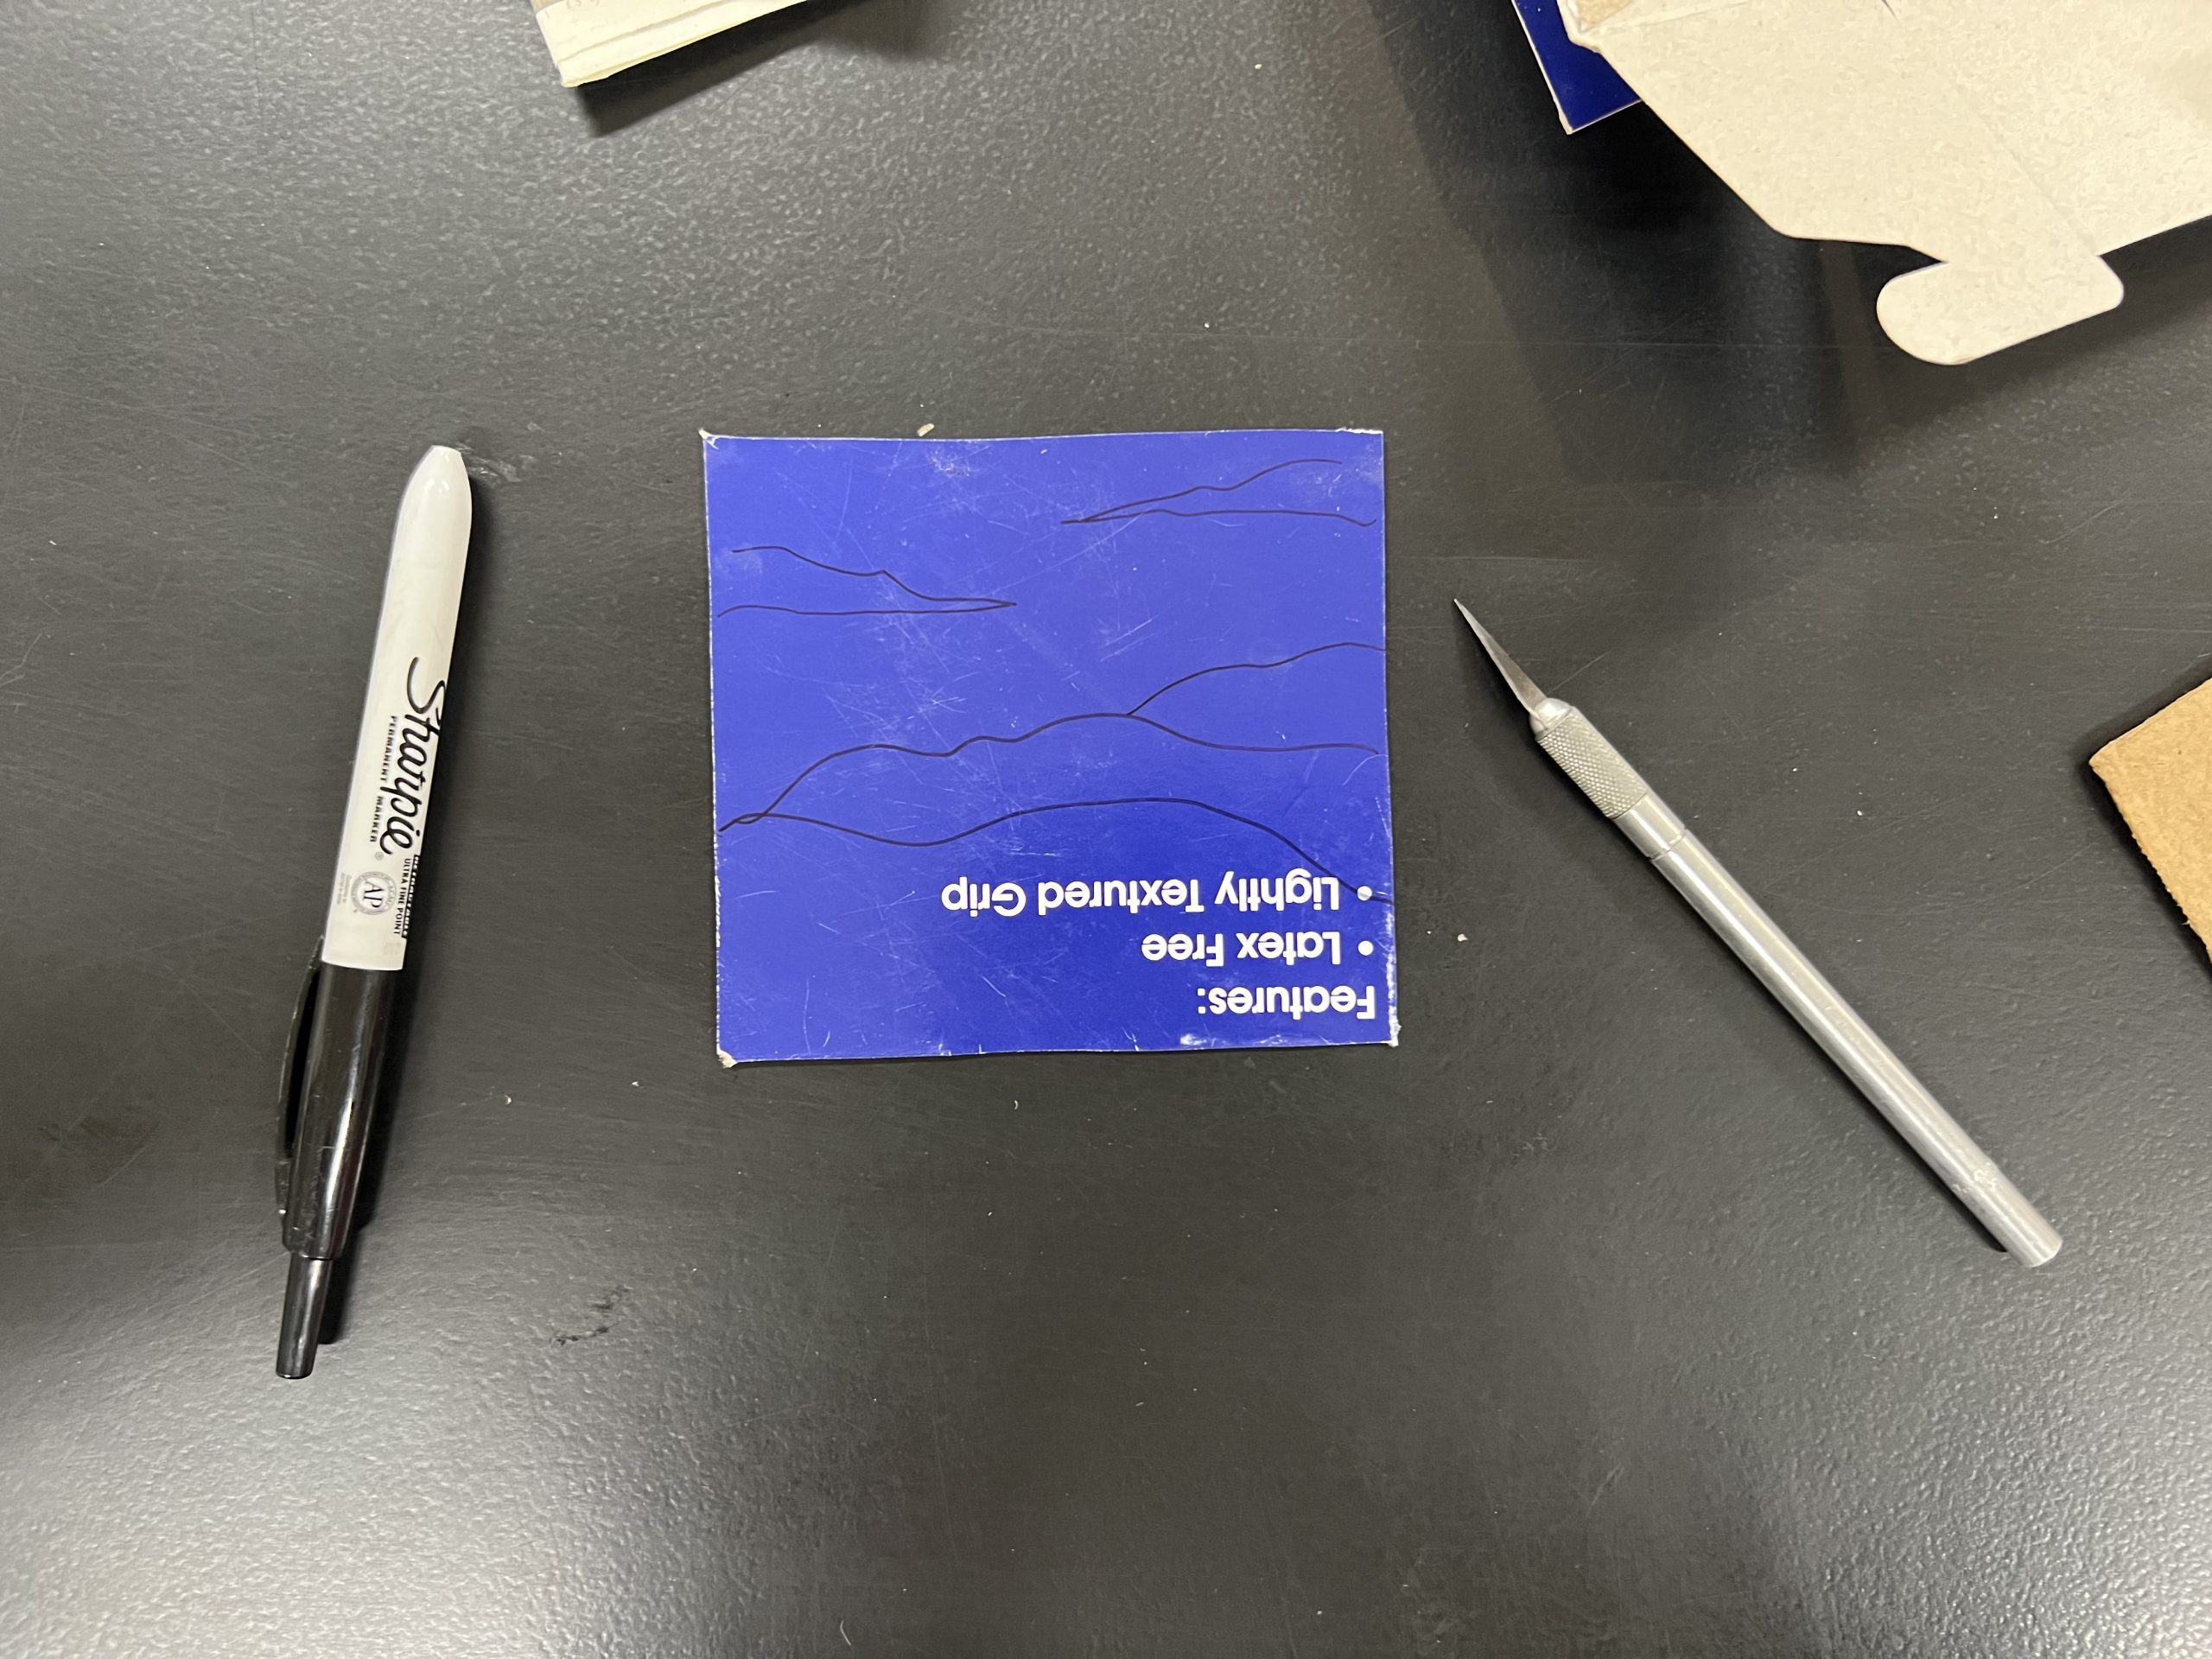
Draw your design on your plate. Plan out which areas you want to be dark and which areas you want to be light. If using a recycled box, use the side with a sealed coat on top — it’ll be smooth and shiny, not rough!
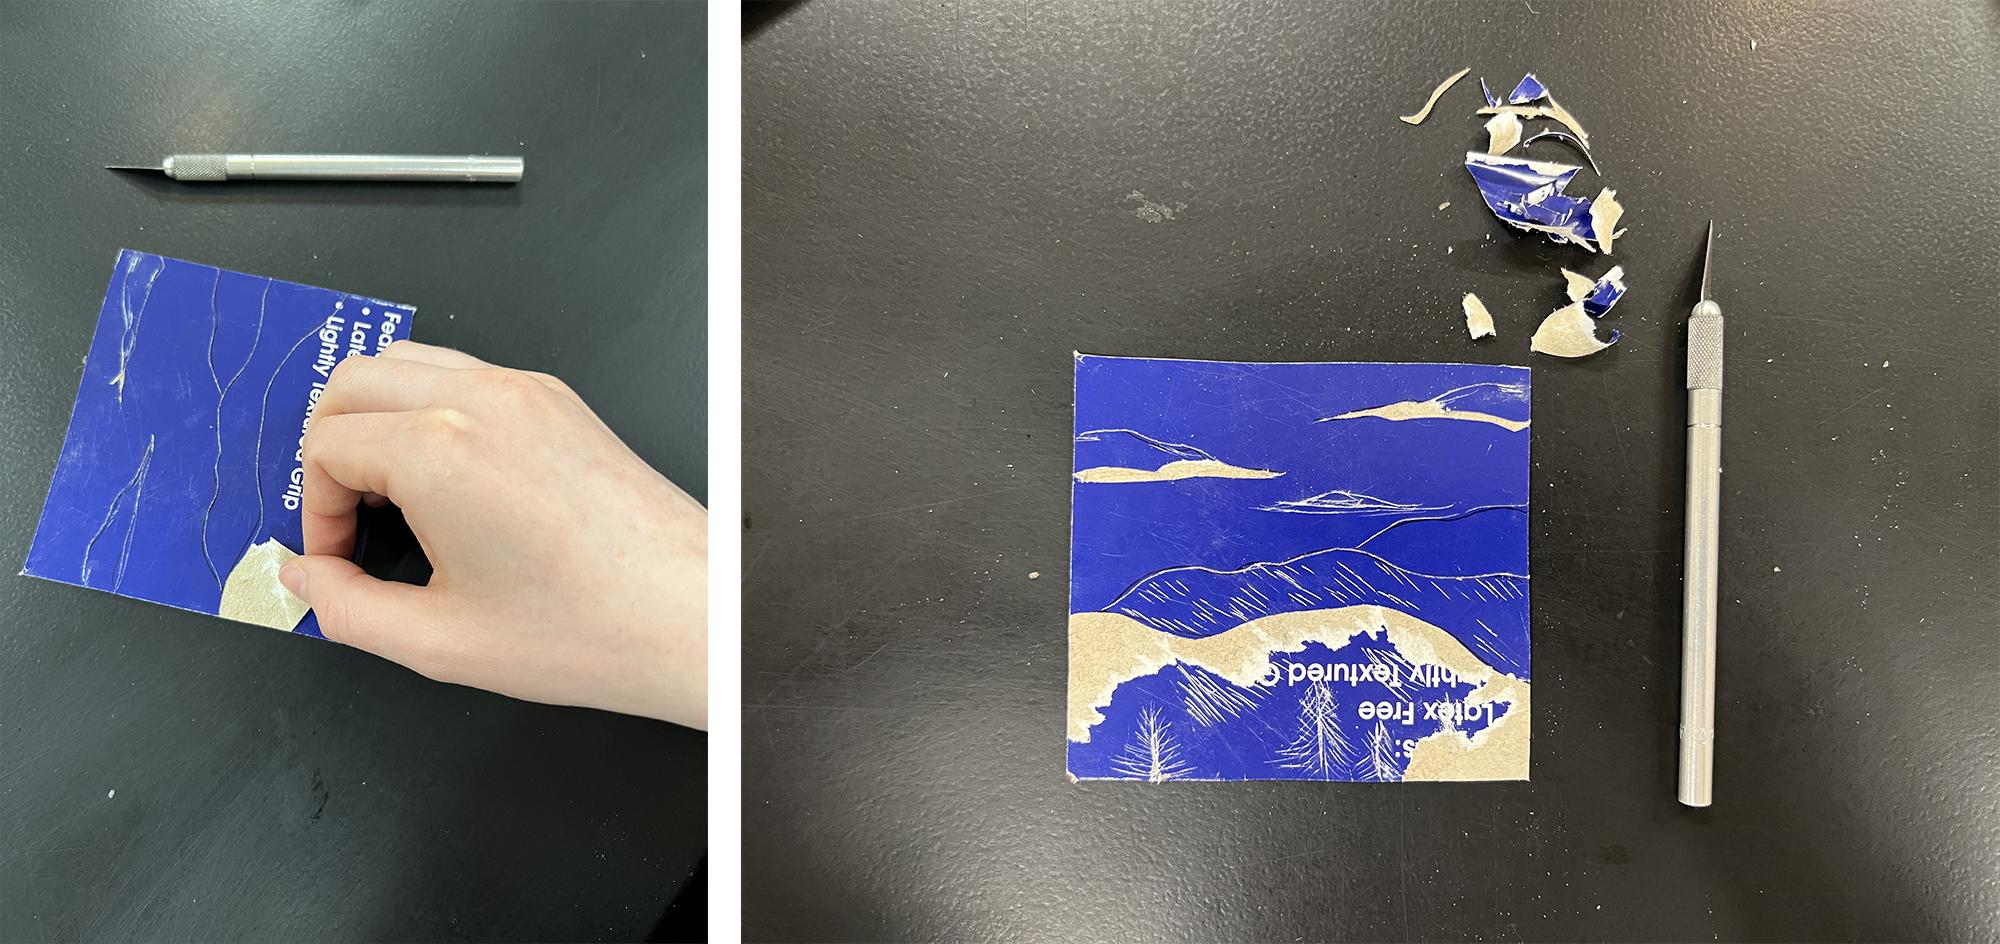
With an adult’s help, use the Xacto knife to go over any lines you want to show up in your drawing. Make a wide enough line that the paint can get into, but be careful not to cut all the way through. Tear out any shapes you want to show up the darkest. (I would recommend having at least some torn areas as I’ve found that these show up best when hand printing.)
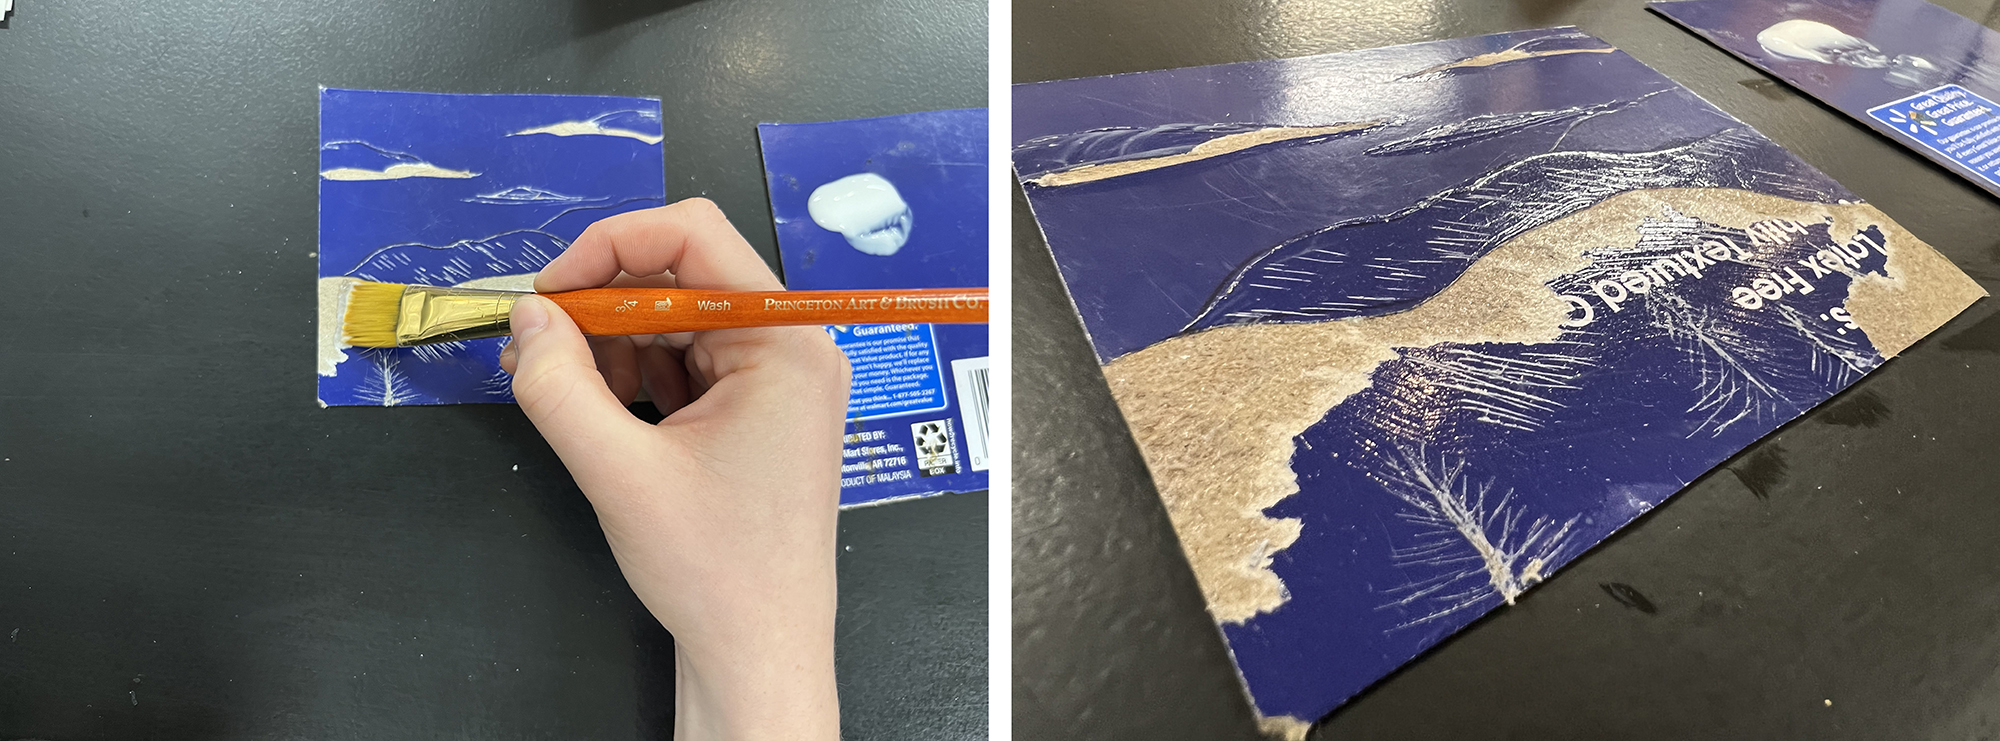
Apply two thin coats of the glue, gloss medium, or spray fixative to exposed parts of the cardboard to seal the plate. Allow each coat to dry completely before applying the next. (A hair dryer on low heat can help speed up this process.) Applying the sealant to other parts of the plate can add texture and allow the plate to pick up more ink in those spots.
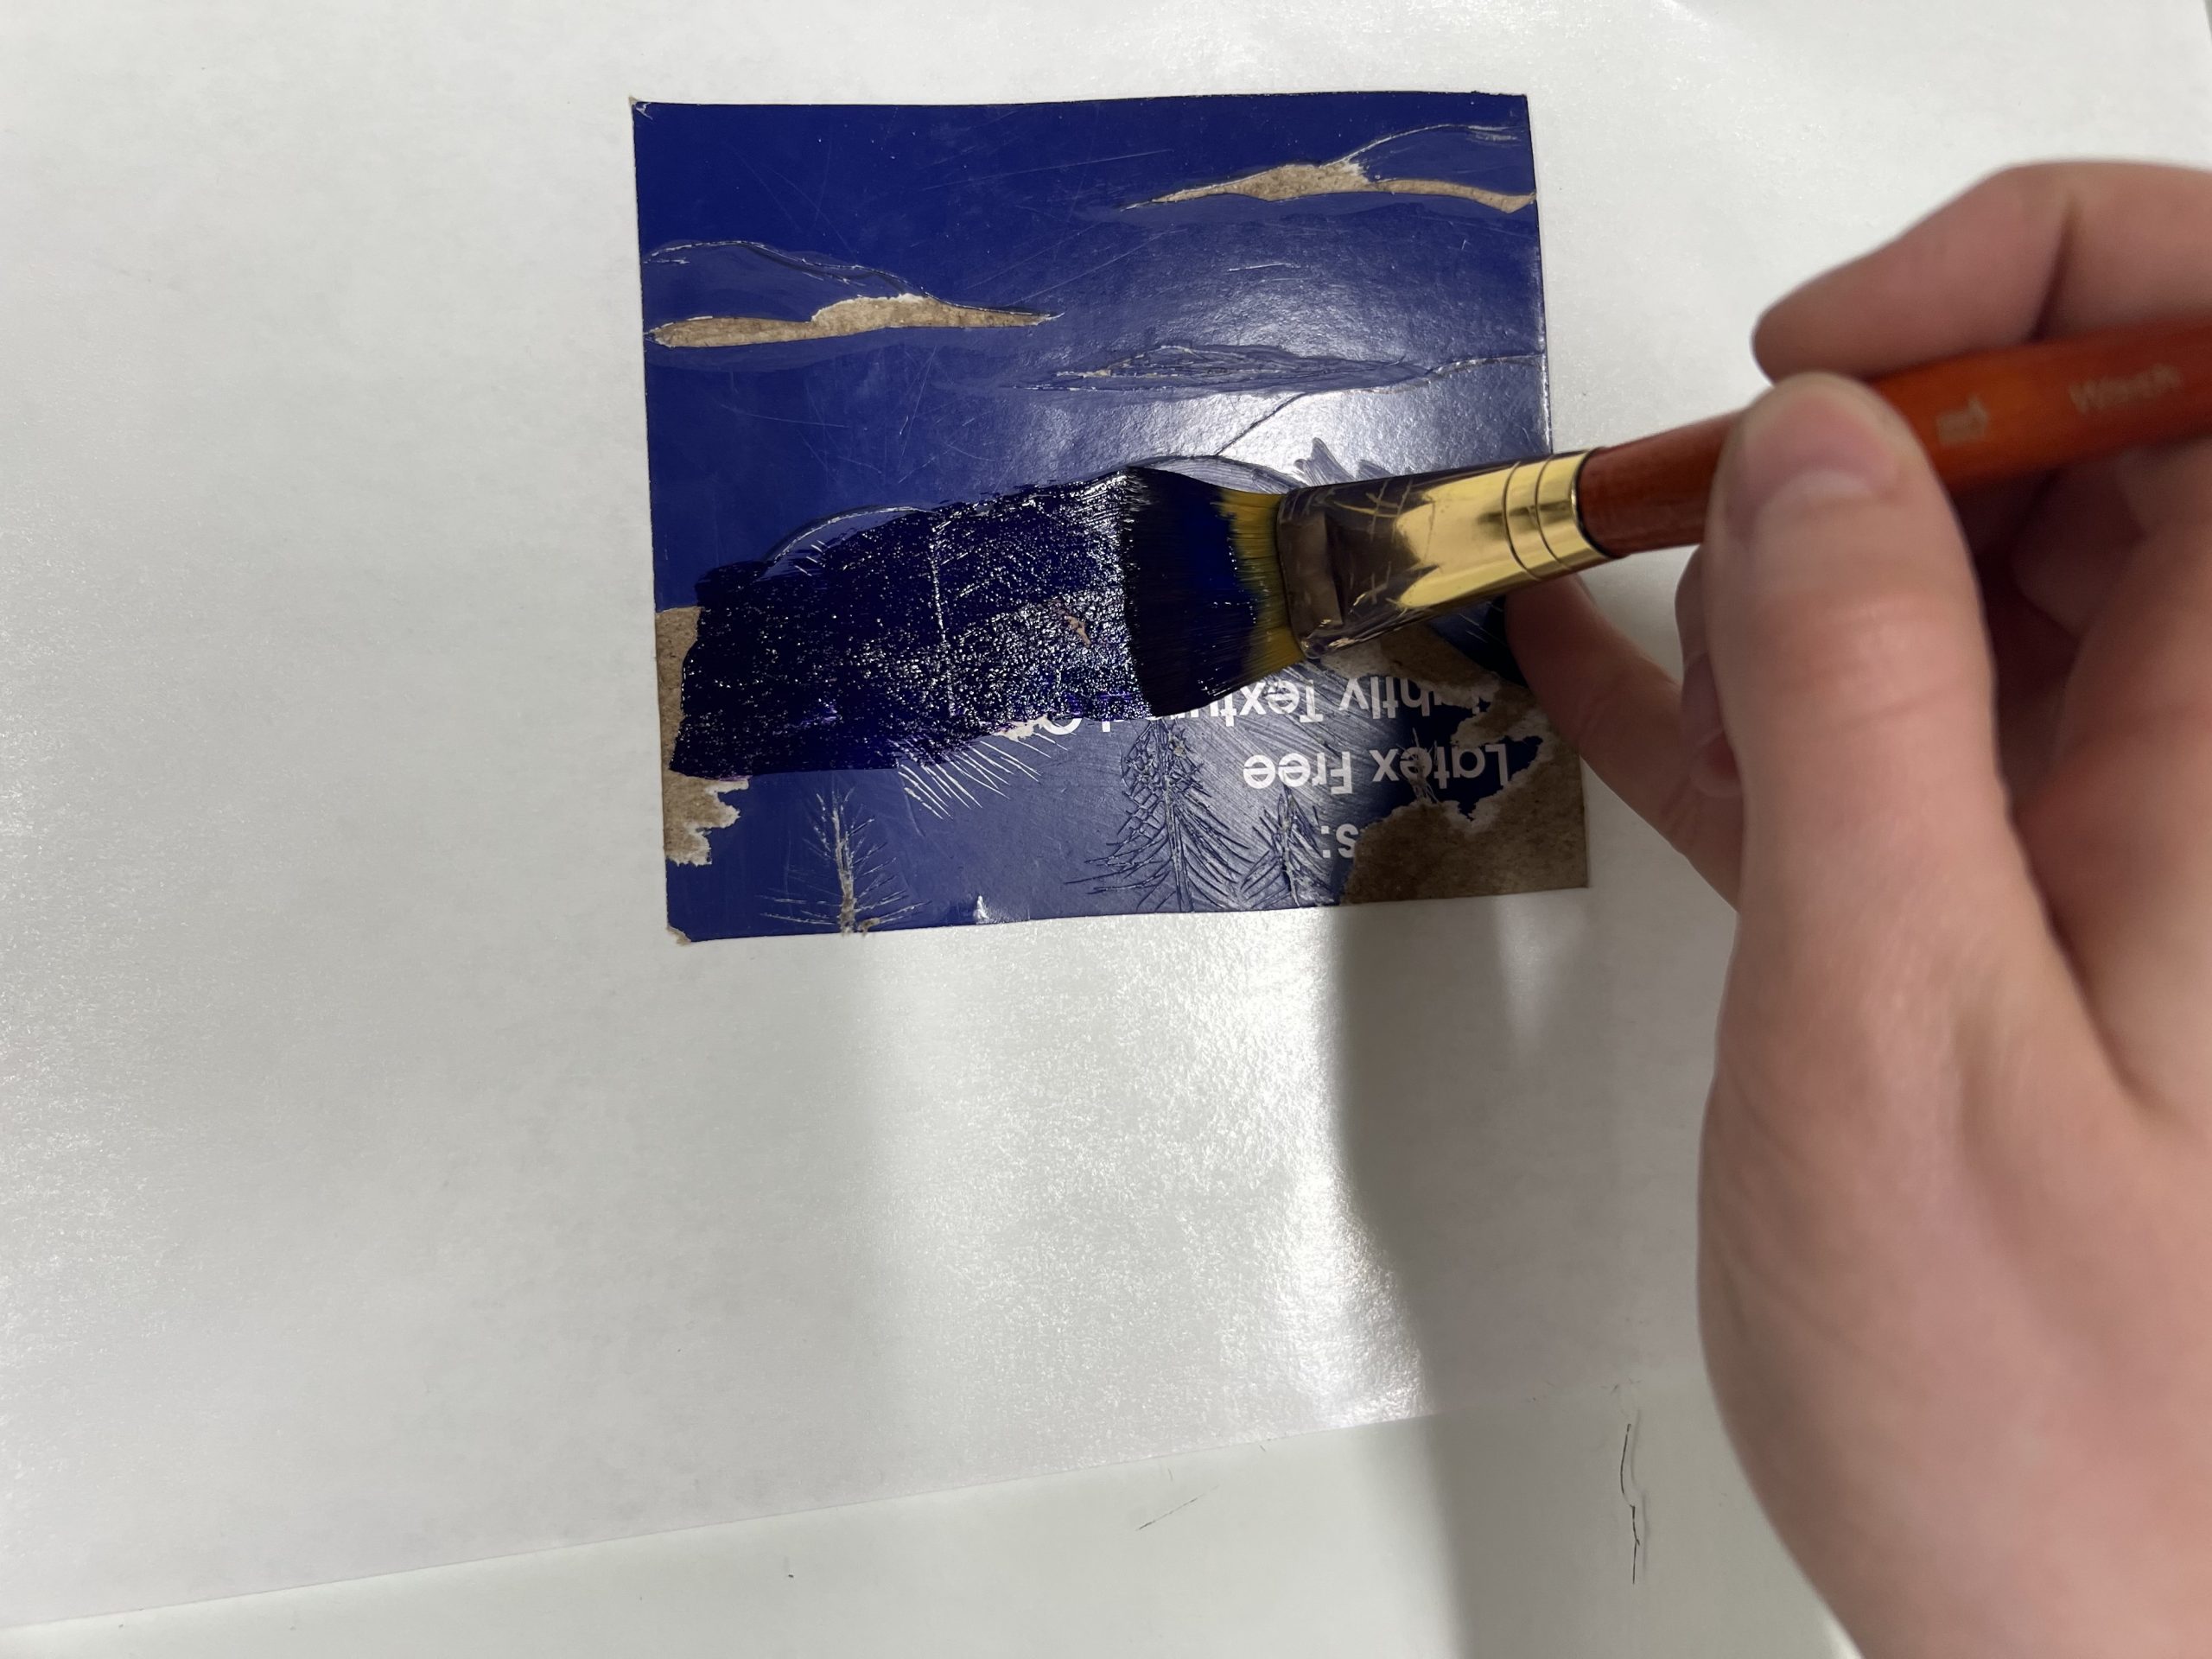
When your plate is dry, put on some gloves and apply a coat of acrylic paint to your plate. Be sure to put the paint on any lines or tears you made on the plate. Be sure to do the next few steps before the paint dries.
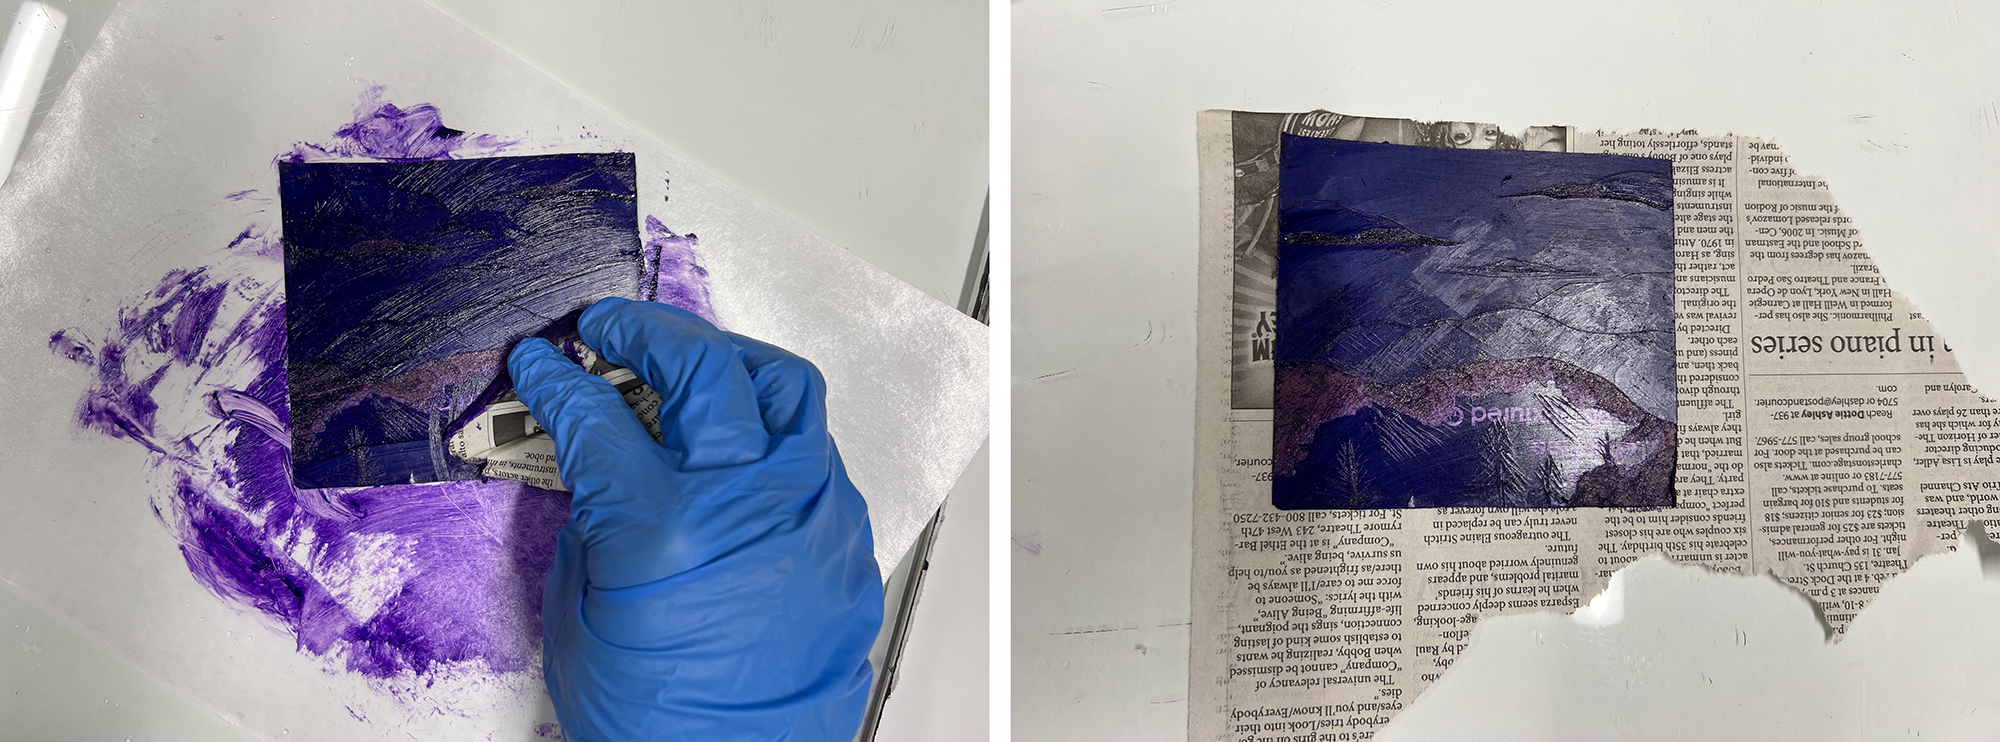
Use newspaper to wipe the plate. Wipe in circular motions. The goal is to make sure paint stays in the lines and tears while areas you haven’t etched have less paint. Be sure the paint is still wet at this step or it won’t print!

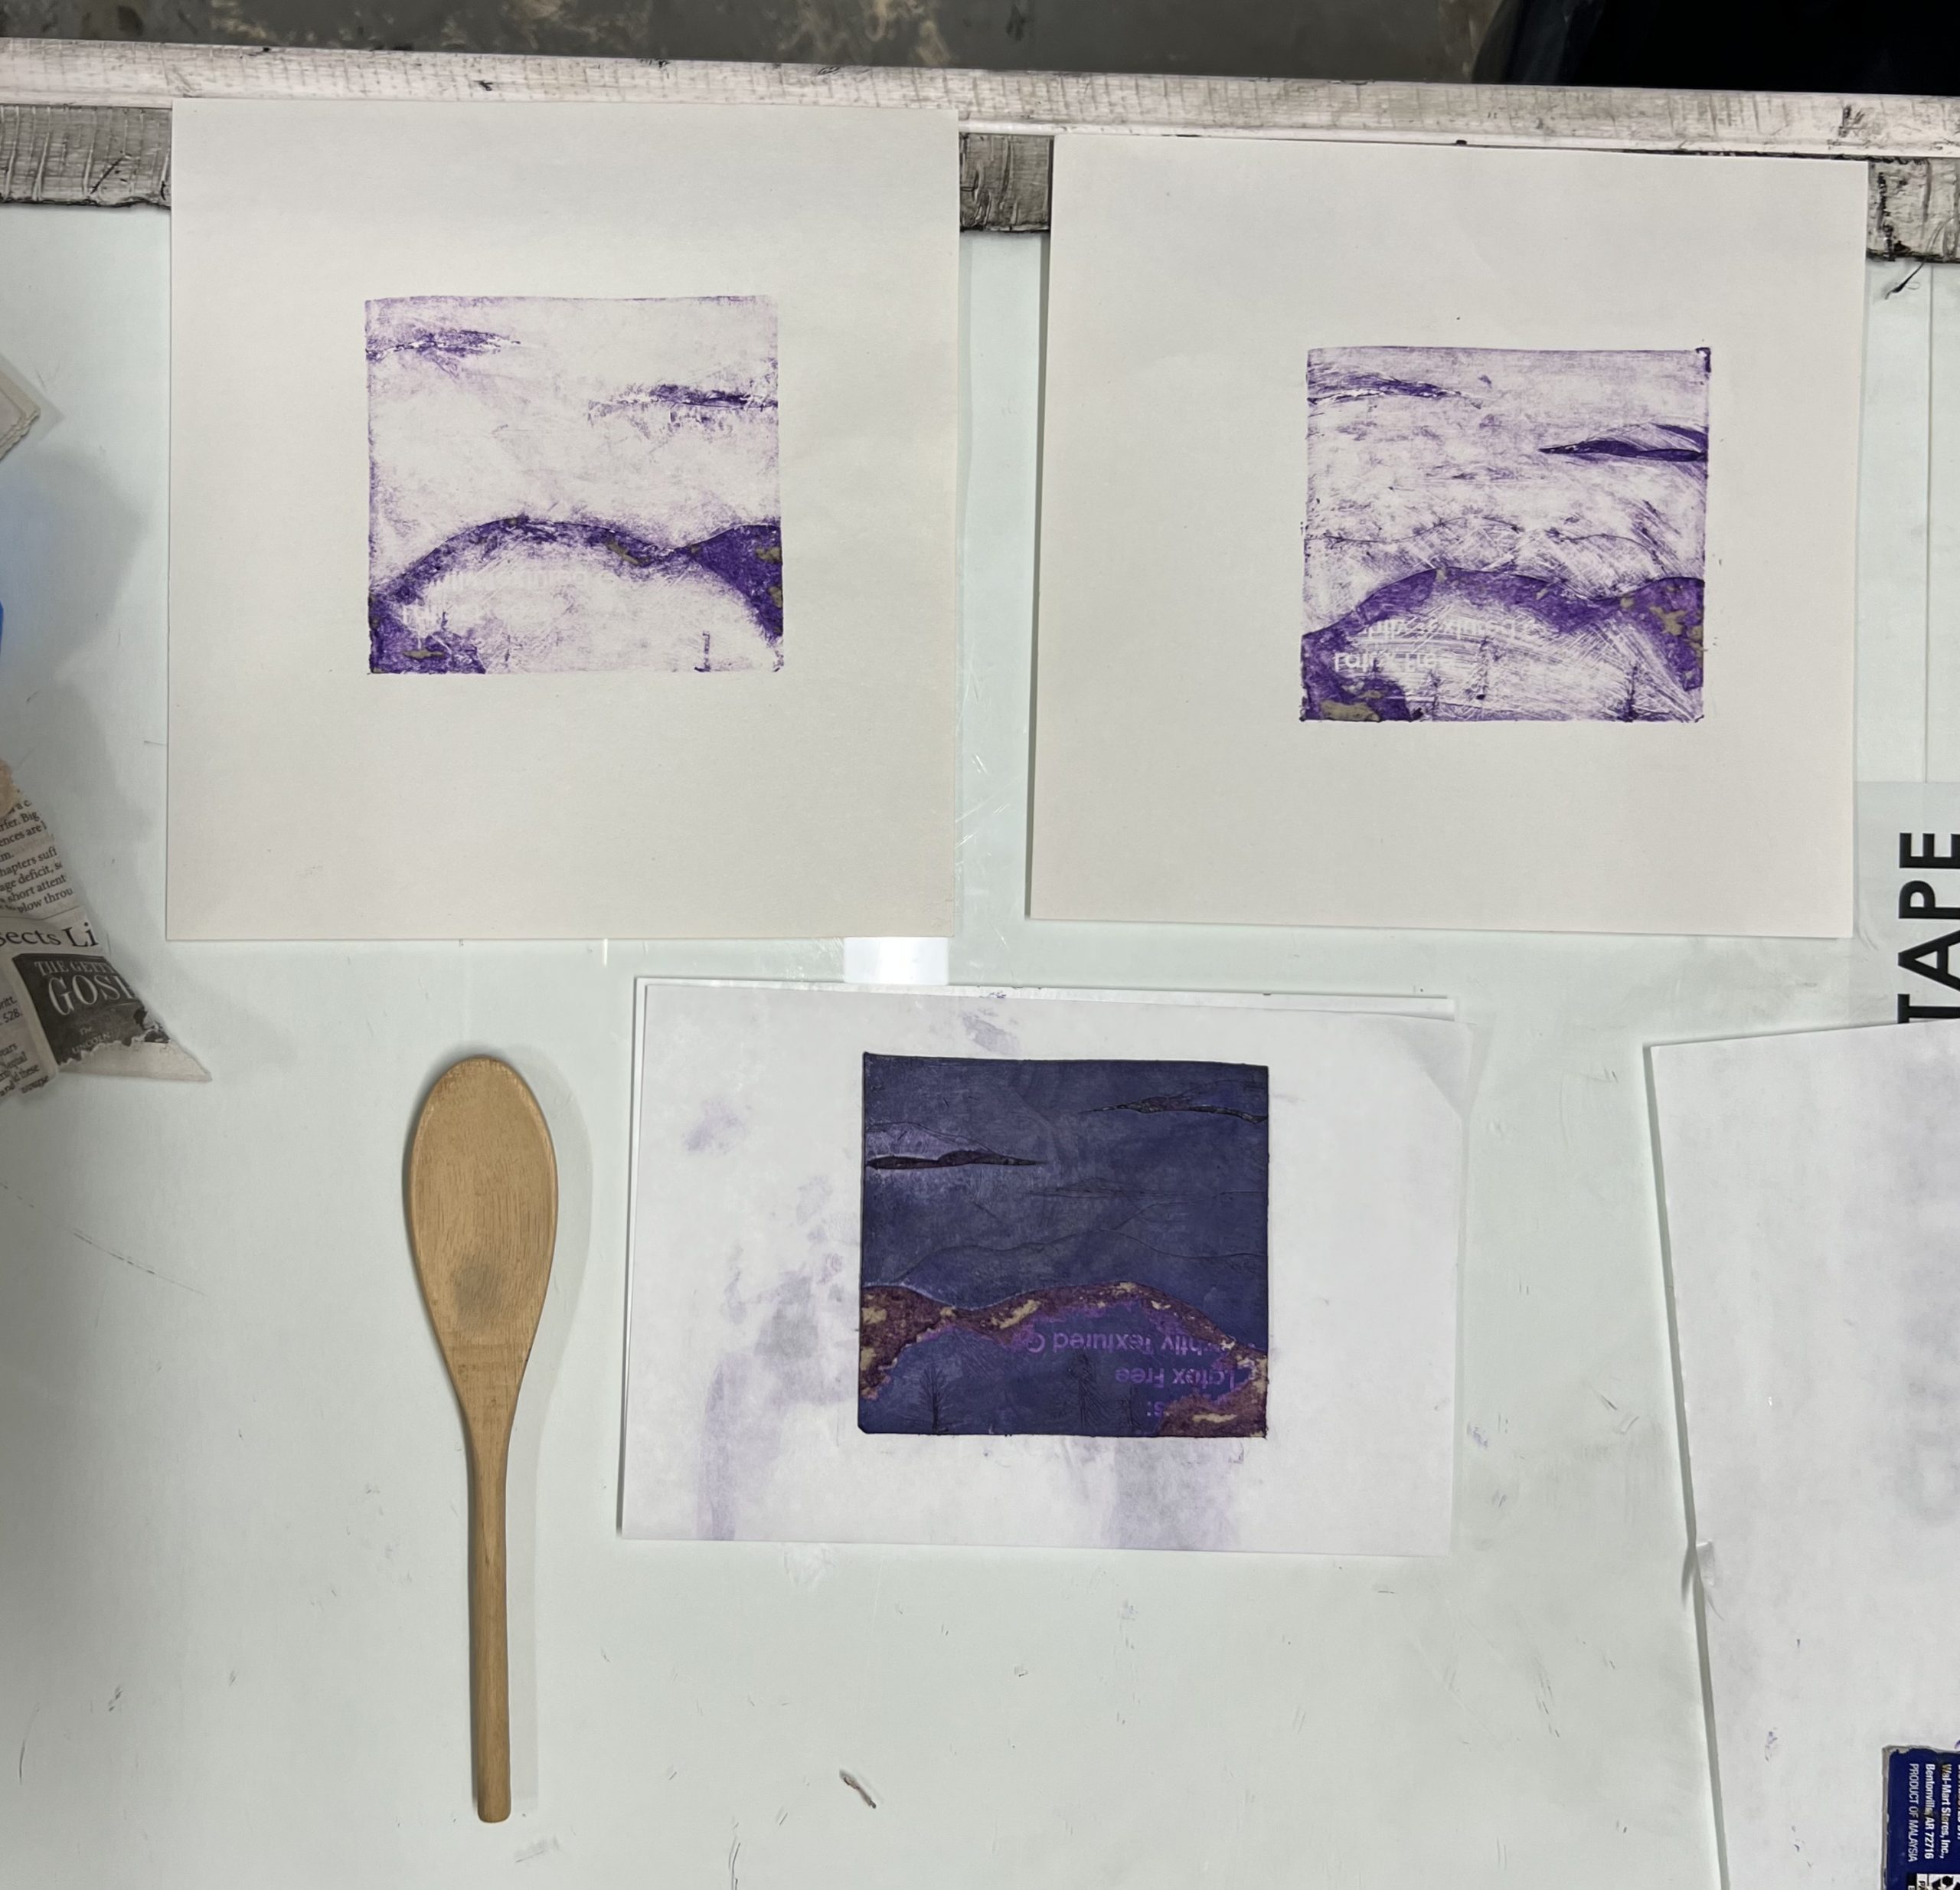
Move your plate to a clean surface. Lay your construction paper over your plate. Use a wooden spoon to print your image. Press hard and work in a circular motion around the whole plate. This will transfer the paint from your plate to the paper. Try using different sides of the spoon.

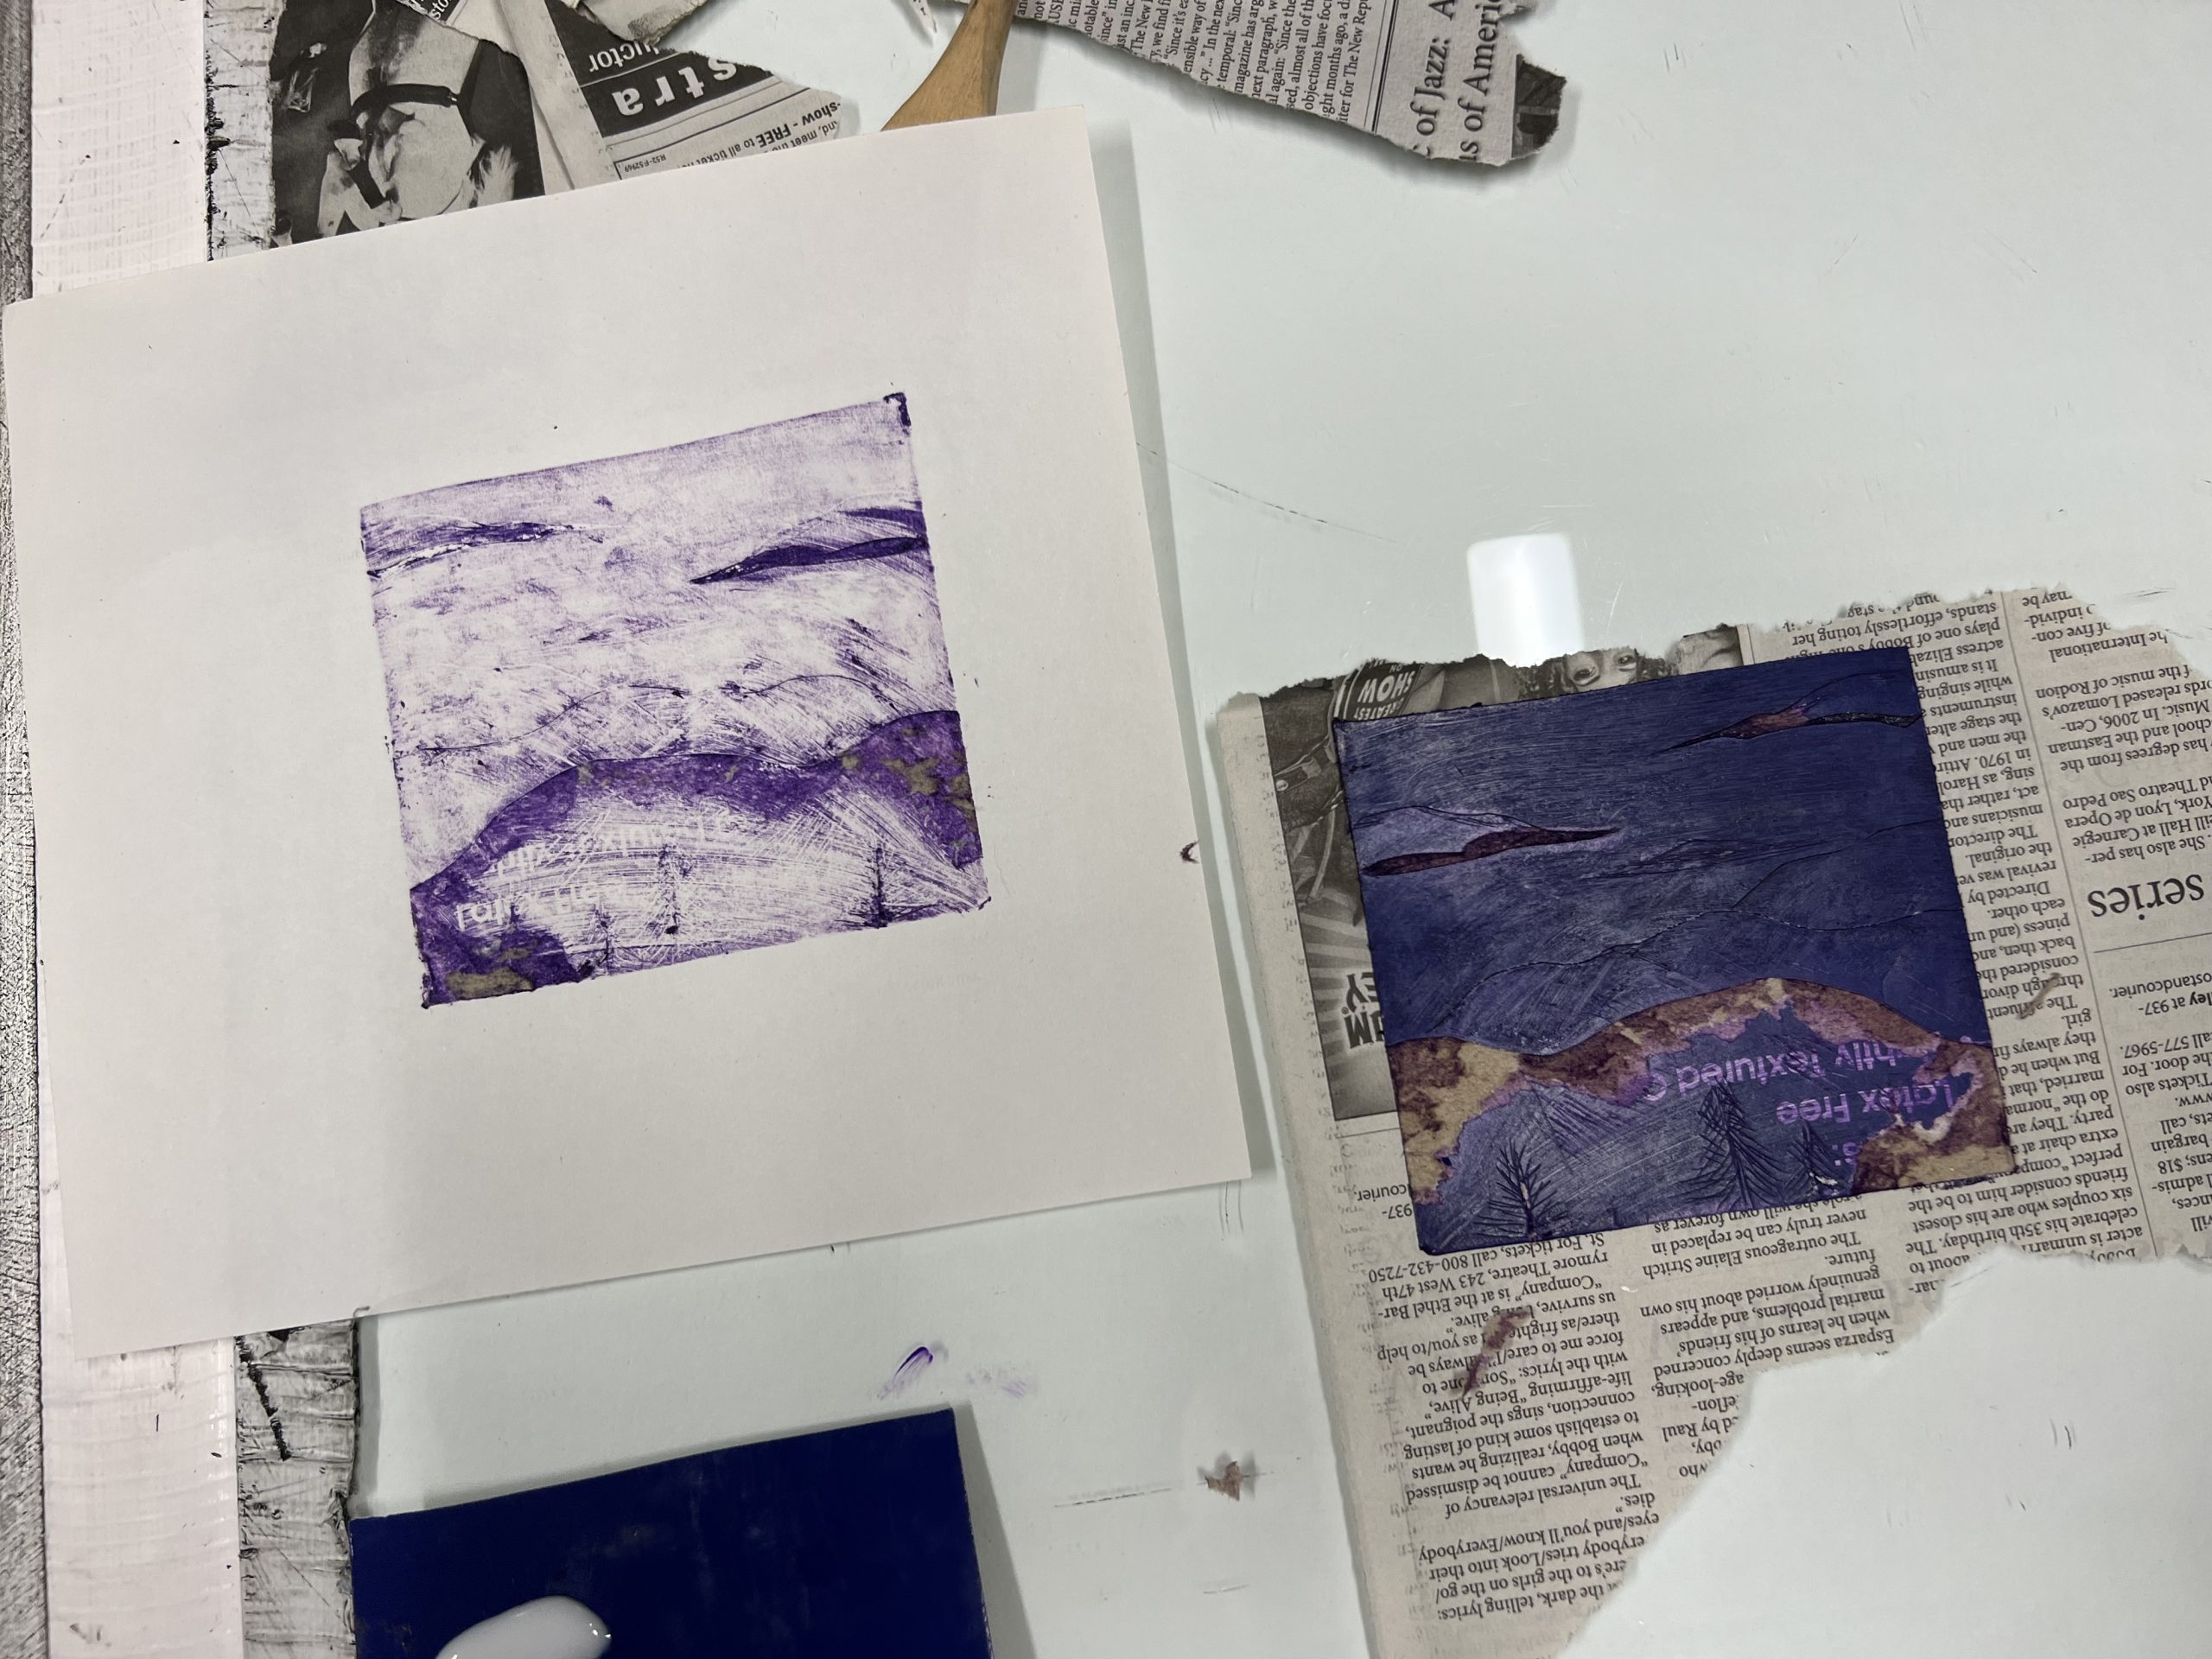
When you can see an imprint of the image through the paper, start in one corner and slowly peel the paper off…

To reveal your first print!
Print a second time if you want! If you didn’t get the results you desire, try printing again with more pressure and make sure the paint is still wet. Metal printmaking plates are more durable and can be used to make many copies of the images at a high pressure using a printmaking press. Cardboard collagraphs are less durable, so they may not last as long – but they are still a fun and less expensive way of experimenting with printmaking!
Send us some pictures of the print you make! You can reach us at halseyTOURS@cofc.edu