Free For All
GALLERY HOURS (during exhibitions)
Monday - Saturday, 11am – 4pm
Open Thursdays until 7pm
EDU BLOG

Art Activity | The Balance of Light and Dark!

Wed Aug 19, 2020

This week’s art activity of 10/10—Reflections on a Decade of Exhibitions is the last in this series. We’re taking a closer look at Cry Joy Park—Gardens of Dark and Light, a solo exhibition by artist Jennifer Wen Ma, which examines issues of social justice and the difficulty of reconciling opposing forces in our society. The balance of light and dark reminds us that we need both utopian and dystopian qualities in society. Cry Joy Park—Gardens of Dark and Light was an installation that featured two gardens, one dark and the other light, which represent a yin/yang balance. Wen Ma wanted it to serve as a reminder that we cannot have one without the other.

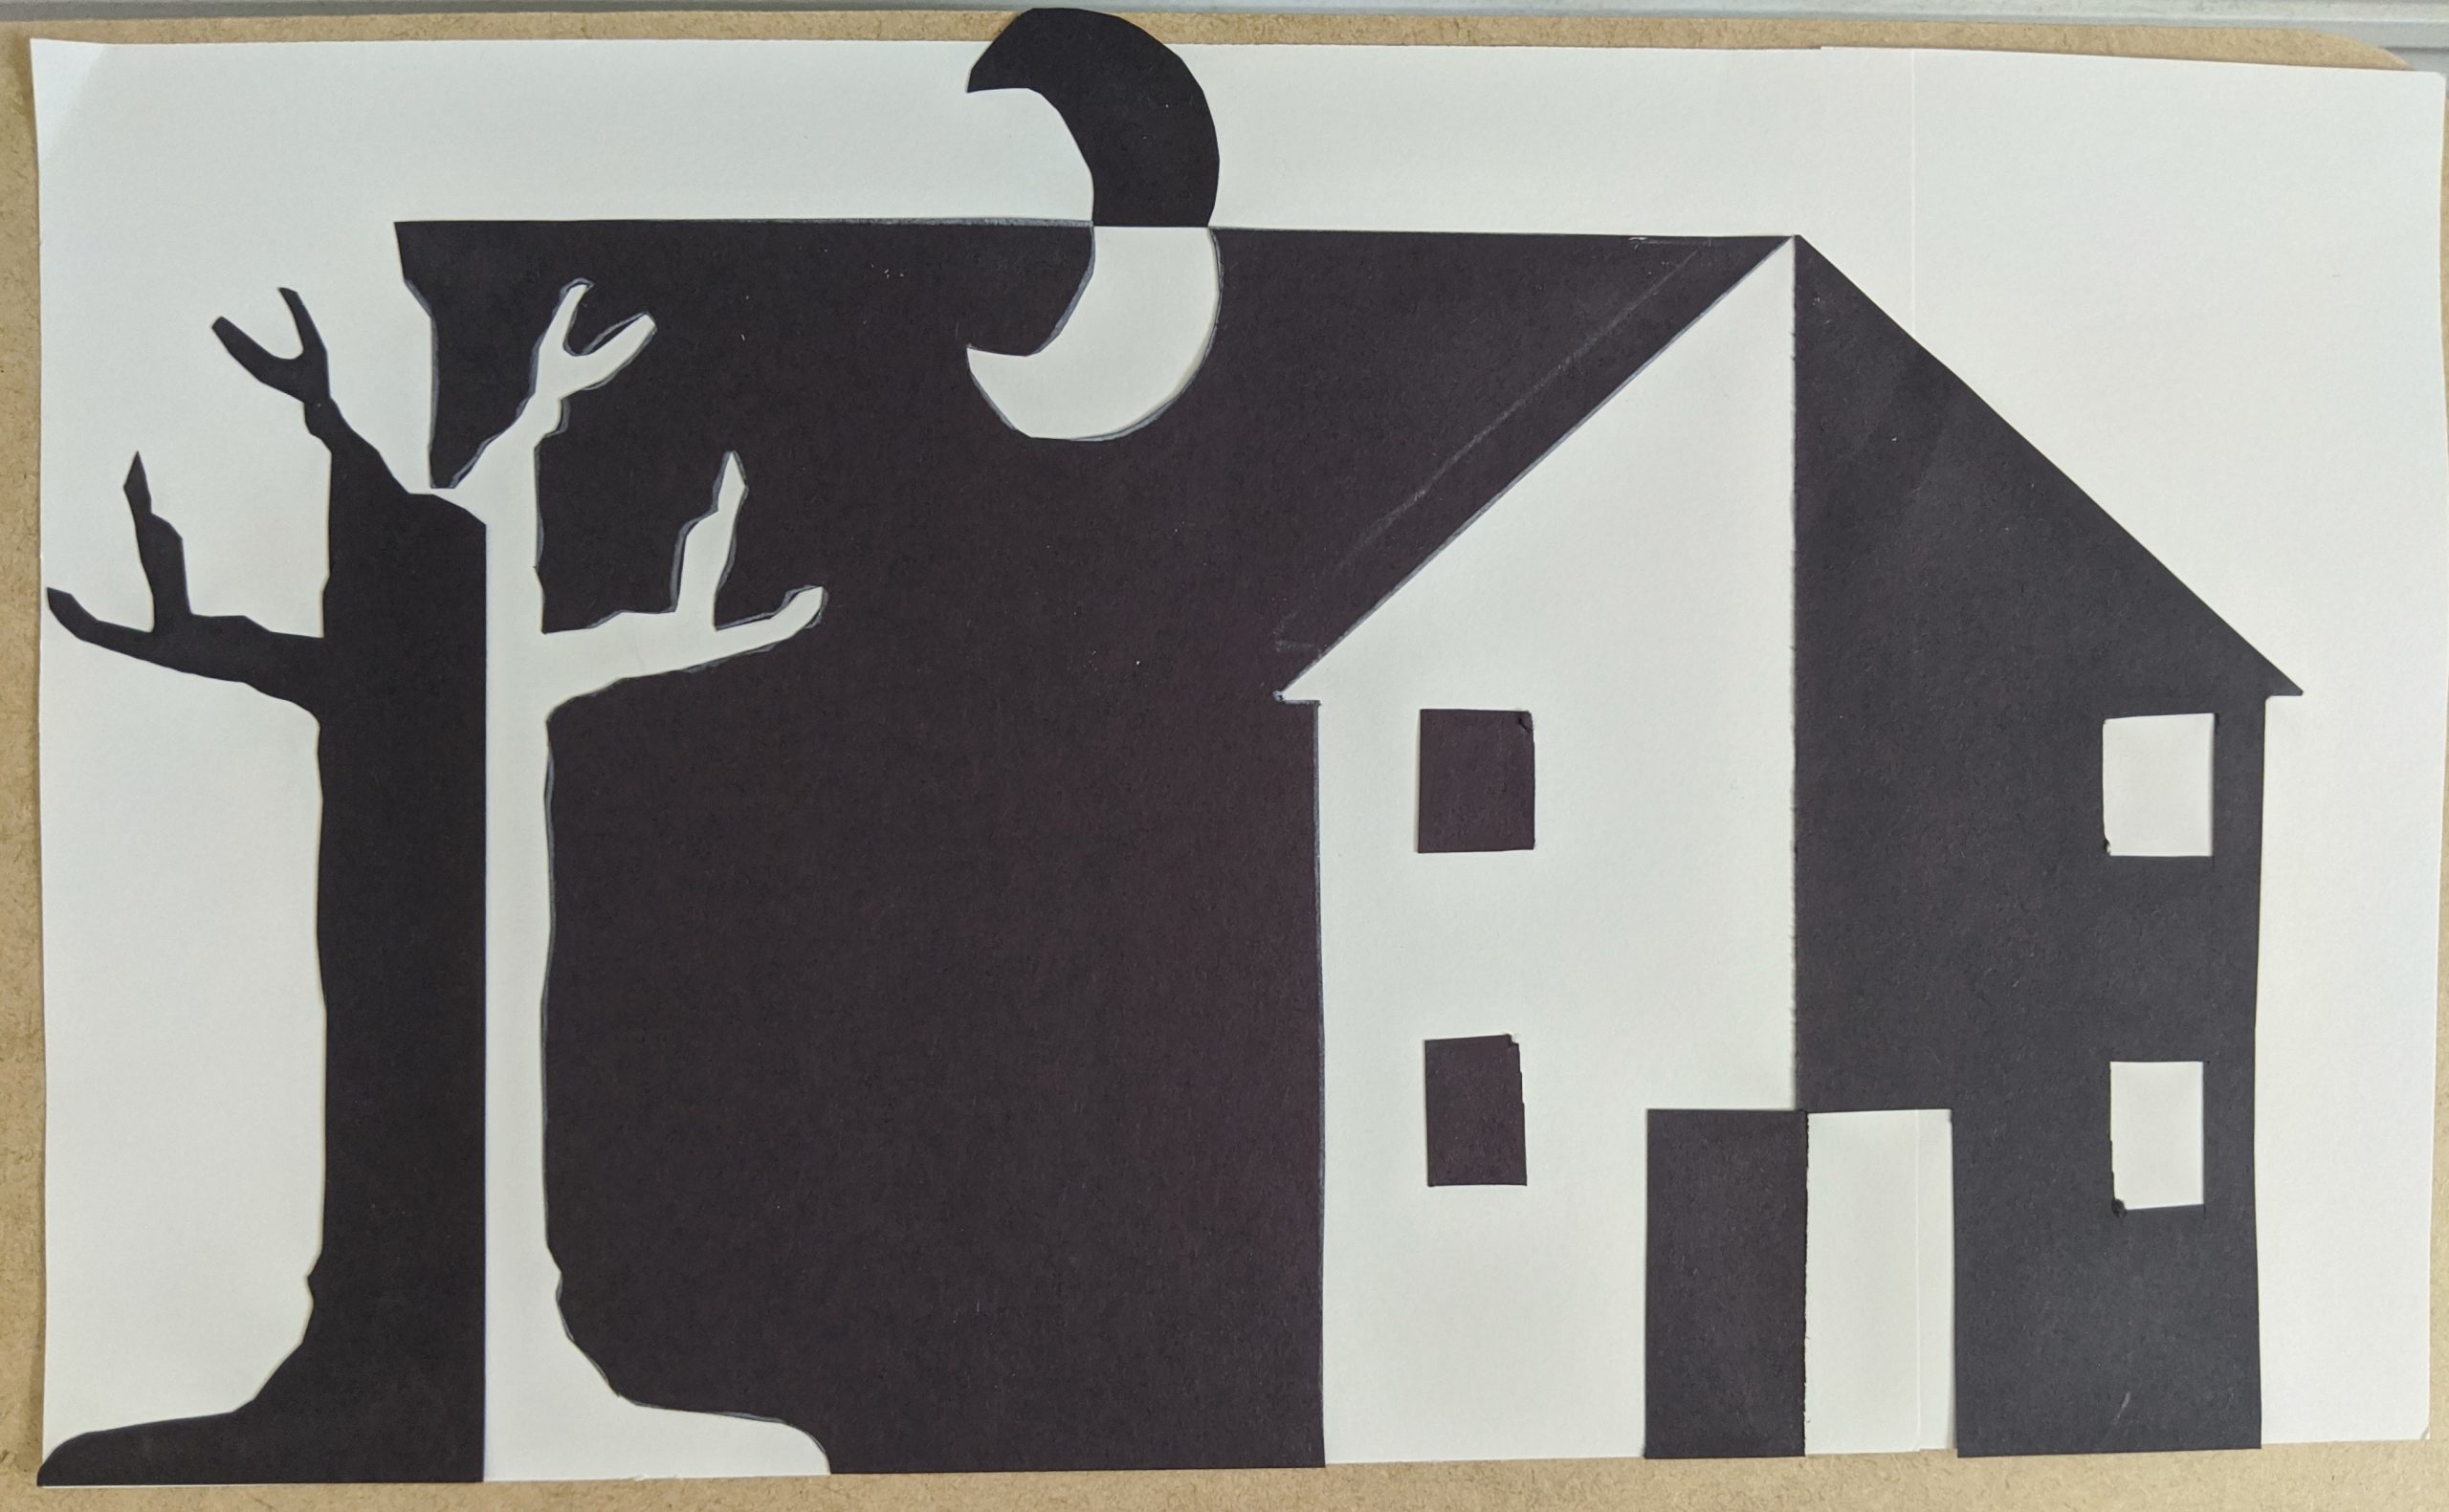
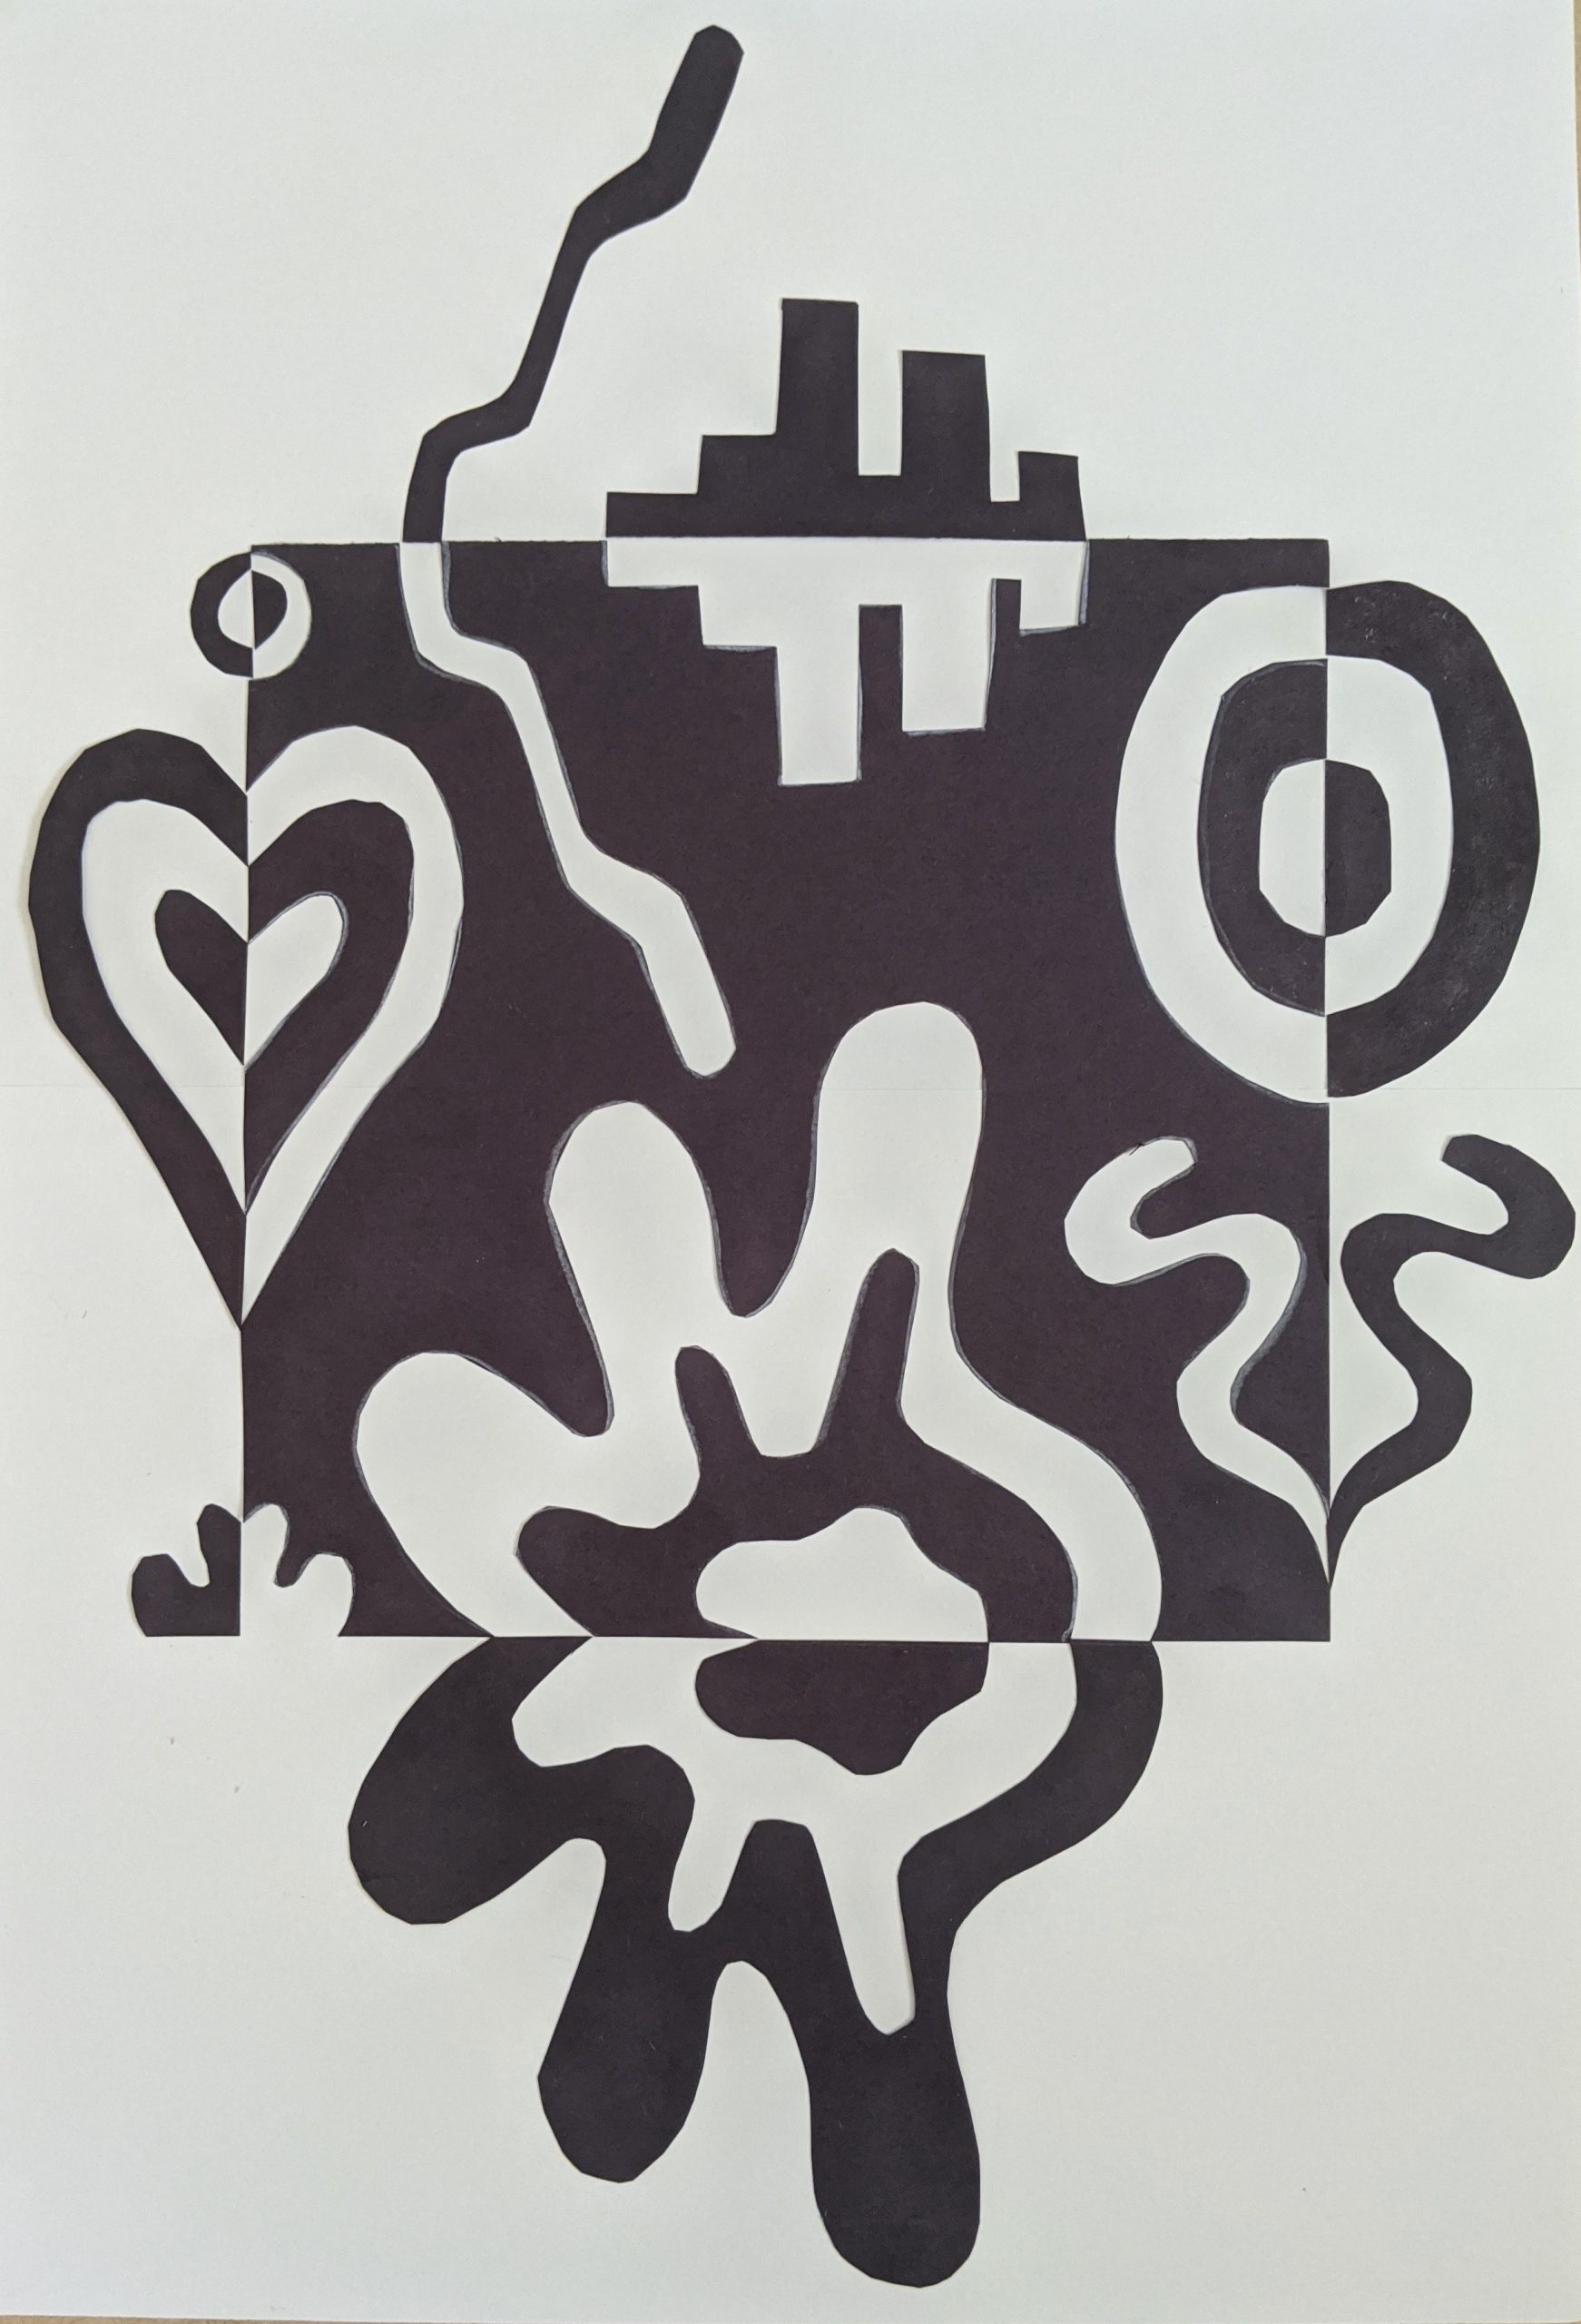
For this art activity, we look to design concepts that use both light and dark, as well as positive and negative space to create a balanced composition. This art activity is reminiscent of a popular design concept taught in many art curriculums called Notan, a Japanese term that means “the combination of lights and darks.” However, designs with a balance of light and dark are not just unique to Japanese art and culture, and are found in a variety of mediums in art globally. For example, Jennifer Wen Ma is native to China, where that balance of dark and light can be found in a lot of art and design elements.

For this project, you will need:

  1. Small paper (one has to be light)
  2. Large paper (one has to be dark)
  3. Scissors
  4. Pencil
  5. Ruler
  6. Glue
  7. White colored pencil

Instructions:

  1. Begin by drawing patterns on the smaller paper, keeping the images on or as close to the edge of the paper as possible. It is better to start with simple images and eventually add more intricate designs. If drawing on black paper, use a white colored pencil.
  2. After the images are drawn, cut out with the scissors. Keep track of the shapes and make sure they match the correct space. Try cutting geometric and organic shapes for variety.
  3. Once all of the shapes have been cut out, begin assembling. Notice how each piece becomes the mirror image of the negative space. Images that are placed on the edge of the paper should touch at the edge.
  4. Once assembling is done to your satisfaction, glue the pieces in place. Make sure what’s left of your small square is glued in the center of the larger paper. Glue down the cut shapes so that they create symmetry with the negative space beside them.

If you did this project or something similar, please share with us! Let us know by email at halsey@cofc.edu. Happy creating!


By Sarah Berry, Halsey Institute education coordinator


Free For All
GALLERY HOURS (during exhibitions)
Monday - Saturday, 11am – 4pm
Open Thursdays until 7pm
843.953.4422


By submitting this form, you are consenting to receive marketing emails from: . You can revoke your consent to receive emails at any time by using the SafeUnsubscribe® link, found at the bottom of every email. Emails are serviced by Constant Contact